support for administrators who conduct evaluations
Assign Forms Using Detail View
This is the last step in the process of setting up your platform for the upcoming school year. It is recommended that the assigned evaluator complete the form assignment task. Evaluators should review all of their educators and confirm evaluation type for accuracy (which can be completed by viewing educators in the Process View). You will see a complete list of the educators you are evaluating along with their evaluation type. Please note - once users are working on forms in the current cycle the evaluation type cannot be changed.
Assigning forms should not be confused with Evaluator Rights. Multiple evaluators can participate in the evaluation process of an individual. However, ONE administrator needs to be responsible for completing and finalizing (thumbs-up icon) the forms.
Form assignments completed at the beginning of the evaluation cycle will give the evaluator the most up-to-date ADMIN VIEW.
Process Options:
- (Best) Building evaluator assigns forms by assigning to the whole building (in the DETAIL VIEW).
- Building evaluator assigns forms by user (in the DETAIL VIEW).
- Form assignment can also be completed by user in the PROCESS VIEW by clicking on the "Man-with-Green-Arrow" for each individual form.
- Form assignments by groups. Super Admin Rights are required to set up groups. For buildings that have multiple evaluators with evaluation rights for all users, yet desire to assign forms to selected administrators assigning forms by groups may be more efficient.
Note:
- If a form has been previously submitted the evaluator will not be able to assign the form.
- Once the form is finalized the evaluator's name is tagged to the form.
- If an evaluator schedules or starts a form, the system automatically assigns the form to that evaluator.
Access the Detail View
- Click on Evaluations icon on the left.
- Click on DETAIL VIEW
- VERY IMPORTANT: Scroll to the bottom of the DETAIL VIEW page. Here you will see a display listing the amount of pages and elements.

Look at the bottom right-hand side of the page to find the total amount of elements listed. If you cannot view the amount, click on the last page arrow or shrink your screen resolution.


The default setting displays 50 elements per page. Increase the number of elements viewable per page to a number larger than the total number of elements. For example, 1000 was entered into the number per page. Now one page provides all forms.
Assign forms BY BUILDING in the Detail View
Reminder: If when assigning forms by building, you are unable to locate the evaluator in the drop-down after clicking "assign selected elements." The evaluator does not have evaluation rights for all educators in the building. In order to continue, you will need to deselect forms of the user(s) not linked to the evaluator you are currently assigning.
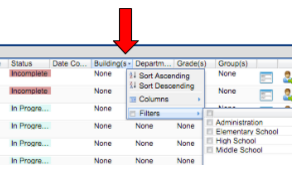
Filter by Building
Assigning Forms by Building for Buildings with Multiple Evaluators
The recommendation is for the principal to assign all forms to himself/herself. Then, have the next evaluator go into the Detail View check bottom of page for number of elements and input a number larger than the total to see all elements on one page. Sort by building, then filter “User” to Sort Ascending. The next administrator is then able to scroll and click on the element box for each user’s form which that administrator will serve as the evaluator responsible for the form. When the administrator assigns forms that were previously assigned to the principal the new assignment will update the form assignment. Continue the process for all evaluators in the building.
Next, go to Step 5 in Complete the Process below and continue.
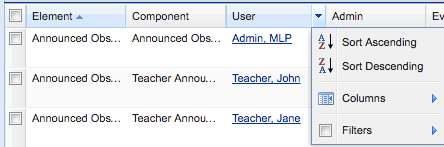
Assign forms BY USER in the Detail View
4.For SHARED Staff you can assign forms by USER, through the User heading down arrow > Filter. Then select the user.
Next, go to Step 5 in Complete the Process below and continue.
Complete the Process
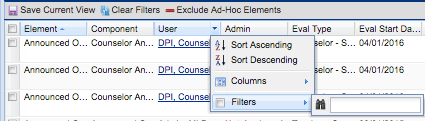
5.Click on the administrator field drop-down arrow. Go to “Filter” and type in "Not Assigned".
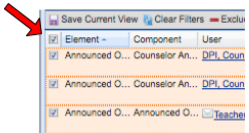
6.Select all forms by clicking the top square to the left of the ELEMENT column, or make only specific selections by checking each box.
7.An Action button appears on the gray bar. Click "Actions" button.
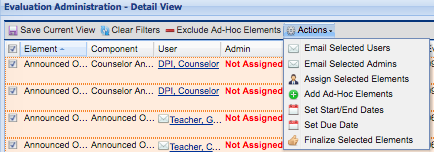
8.Click "Assign Selected Elements"
9.Choose the Evaluator from the list and click submit.
(Note: If you do not see an administrator’s name in the drop-down options, the administrator does not have evaluation rights to user/users in the building.)
Remember to always clear filters after assigning forms before going on to the next building or evaluator. You will be able to determine if filters are still on if you see any yellow highlighting on the column names.
If you would like to save a Detail View, read the article “Saving, Sharing, and/or Formatting a Detail View”.
Assigning Forms by GROUPS in the Detail View
Assigning forms by building or user is recommended. However, assigning by groups is an option. Super Admin Rights are required to set up groups. For buildings that have multiple evaluators with evaluation rights for all users, yet desire to assign forms to selected administrators assigning forms by groups may be more efficient.
To assign forms by Groups:
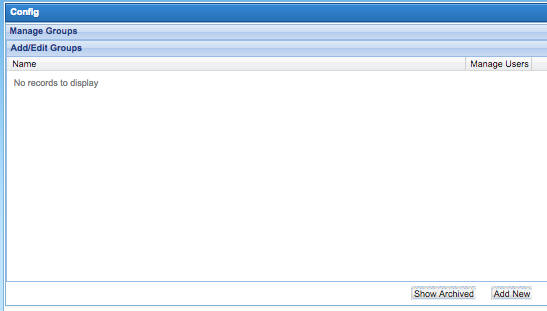
- To Access: Configuration Tools > SITE CONFIGURATION > Groups List
-
At the bottom of the screen click “Add New”.
-
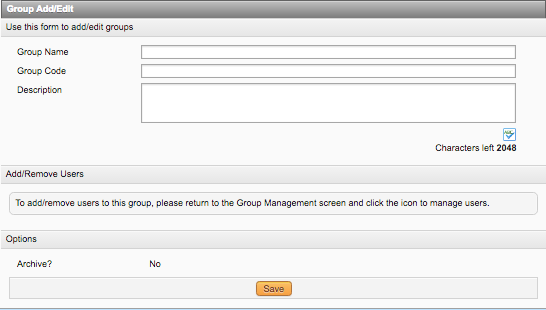
On the Group Add/Edit screen, name the group and click "SAVE".
-
Next, DO NOT hit “return”. Go back to the left navigation bar and click on "Configuration Tools > SITE CONFIGURATION > Groups List" again to find your new group. Click "Manage Users" ".

-
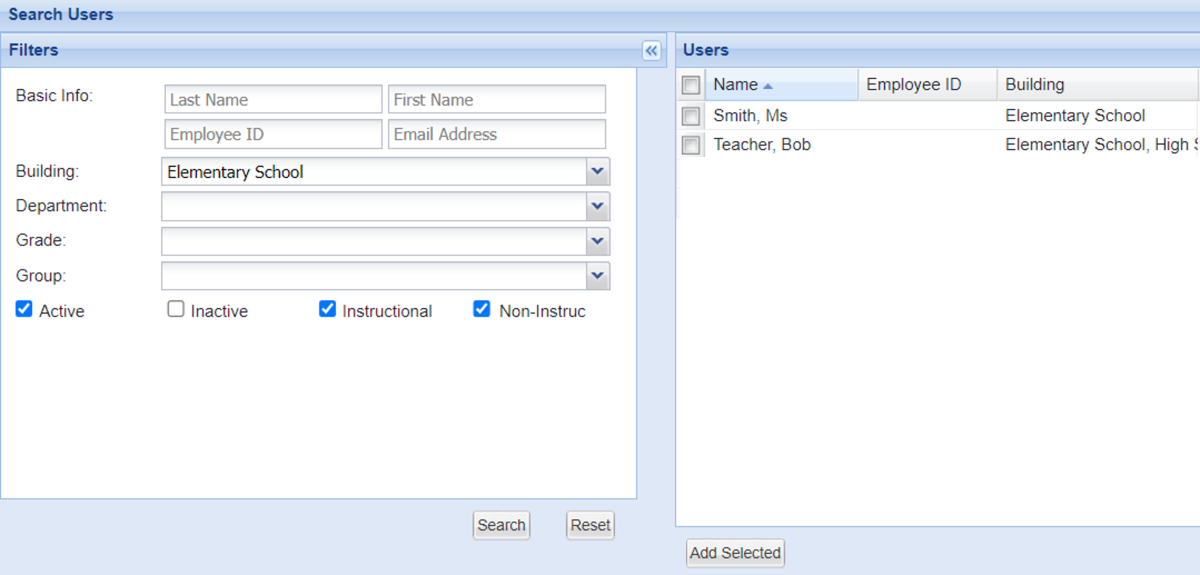
Select the appropriate building, department, or grade. The corresponding users assigned to the selected filter will populate to the right.
-
Click the users to be assigned to the group, department or grade.
-
Click “Add Selected” button. Group members will be displayed.
Note: REPEAT the assigning groups step for designated evaluators. -
Next, go to the Detail View (in "Evaluations" on the left navigation bar).
-
This step is a very important step to be sure that ALL forms are assigned to evaluators.
Scroll to the bottom of the page. Here you will see a display listing the amount of pages and elements. Look at the bottom right-hand side of the page and you will see the amount of elements listed. If you cannot view the amount, click on the go to last page arrow (see images at beginning of this article).
The detail view displays total number of elements in the bottom right-hand corner. Only 50 elements are viewable on one page. Increase the number of items viewable per page to a number larger than the number of total elements to show all elements on one page.
Now that you are on the Detail View, locate the Groups column. You may need to slide your view to locate the Groups column or you could uncheck fields not needed. For example, evaluation start date and evaluation end date.