support for administrators who conduct evaluations
Evidence Collection Tool
Purpose: The Evidence Collection Tool provides a quick and easy way to document evidence during observations. When using the Evidence Collection Tool the evaluator/observer is able to type in evidence (even using defined keyboard shortcuts) and align that evidence to rubric components at the same time, or the evaluator can choose to document the evidence statements and then align the evidence to corresponding components after the observation. The Evidence Collection Tool can only be used when the icon is not ghosted out for that form.
To Access follow the path: Evaluations > ADMINISTRATION > Process View
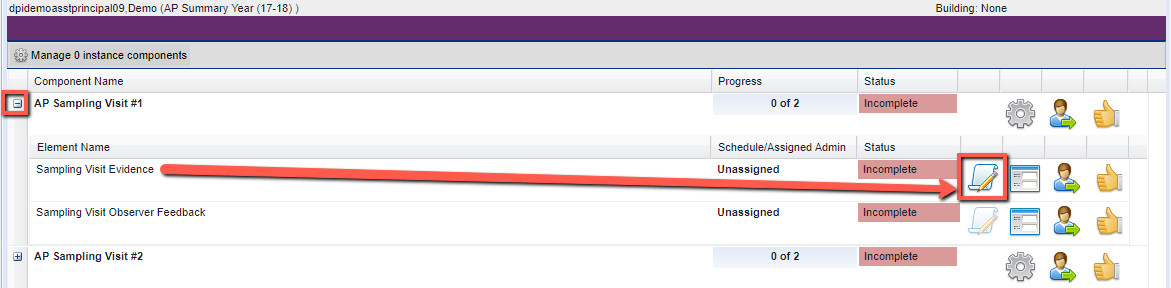
Select the educator you are observing. Locate the observation component, select the plus sign to expand the component, and locate the form. Select the "scroll" icon to bring up the Evidence Collection Tool. ![]()

IMPORTANT: Don't lose your observation data
It is very important NOT to open the actual form in one tab and the Evidence Collection Tool in another tab at the same time as evidence collected can be lost. When you select the Evidence Collection Tool icon, the form will automatically open up behind the tool. You will know if you have two tabs open with the same form name are displayed like below:
![]()
If upon clicking "sync" your evidence statements are no longer available in the Evidence Collection Tool nor are they in the form, email Frontline Technical Support at pgsupport@frontlineed.com to request an investigation to try to locate the data in the system. In the body of your email include the name of the user who completed the observation, the name of the user who was observed, and the specific title of the observation event/component. Additionally, include the name of the district/charter in the subject line with "WI".
How to Use the Evidence Collection Tool
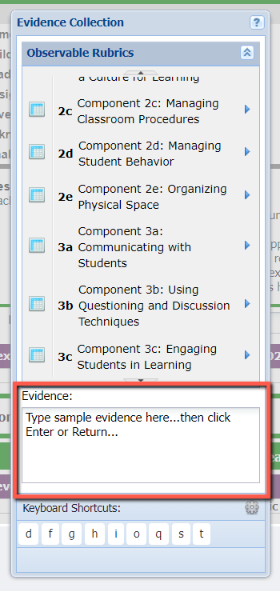
Keyboard Shortcuts
The Evidence Collection Tool provides the evaluator with the option to use keyboard shortcuts. Select the gear icon to view the preset "student" and "teacher" shortcuts.
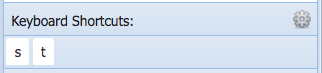
Create and add your own shortcuts by selecting the Settings “gear” to the right of "Keyboard Shortcuts:"
Move or resize the Evidence Collection Tool
Click and hold on the top bar of the Evidence Collection Tool to drag the box over to a new location.
IMPORTANT: If you click on the Evidence Collection Tool icon you will be capturing data and then syncing to the form. While using the tool you are also able to view, but not enter data into the form.
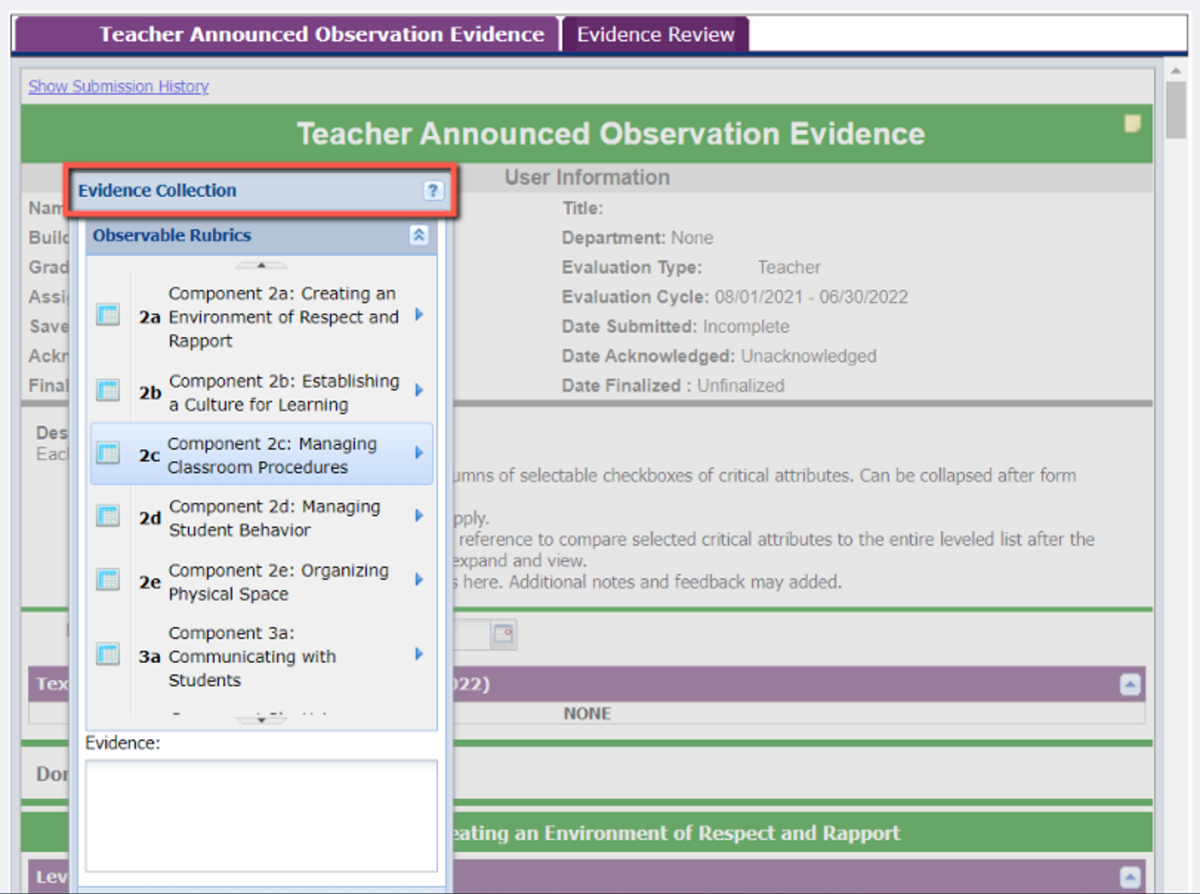
Enter Evidence Statements in the "Evidence" box
Put the cursor in the Evidence box and press "Enter"/"Return" on the keyboard after each statement of evidence. This will collect and be stored under the "Evidence Review" tab at the top of the form.
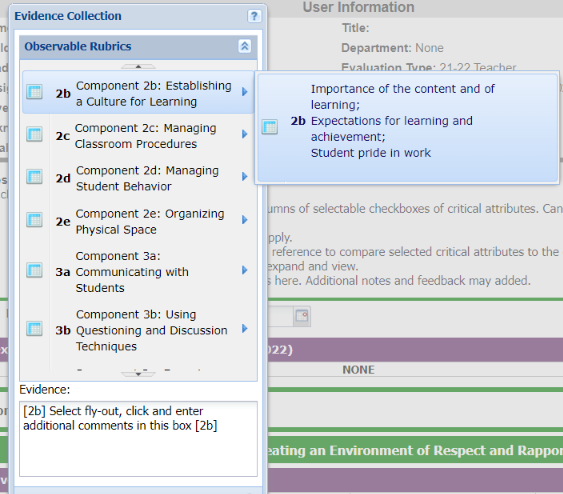
You can also choose to align each evidence statement as you enter it by hovering over the identified component(s) and selecting the appropriate fly-out indicator. This too will collect under the "Evidence Review" tab.
Align Evidence Statements to Rubric Components ("Evidence Review" tab)
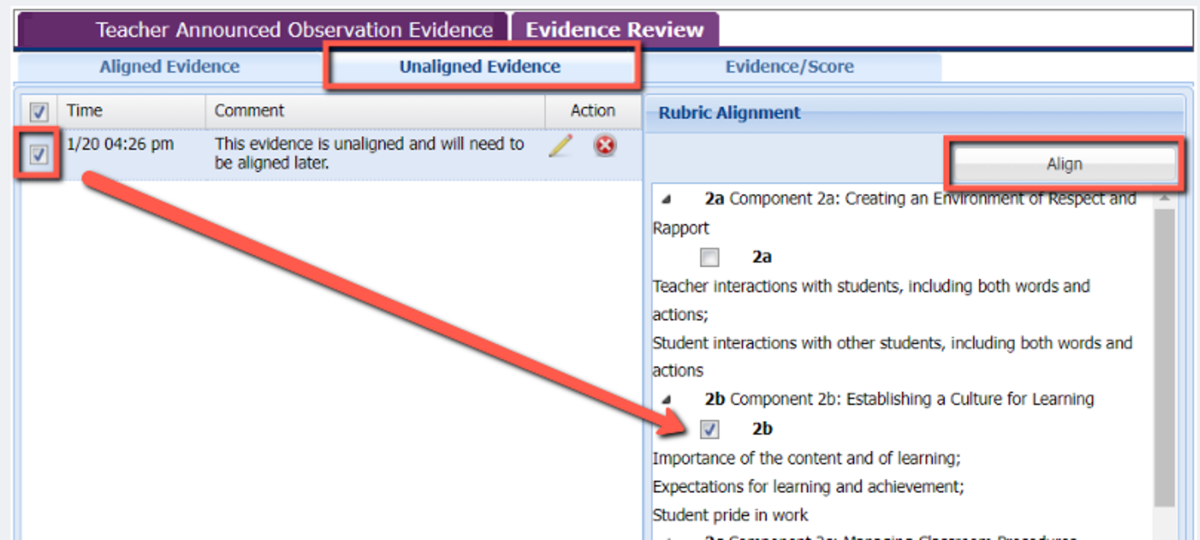
Once evidence statements are collected, select the "Evidence Review" tab at the top of the form. This will bring up a screen with three tabs: "Aligned Evidence" (evidence already aligned to indicators), "Unaligned Evidence" (evidence yet without rubric alignment indications), and "Evidence/Score".
![]()
-
Select the "Aligned Evidence" tab to see any evidence statements collected that have been aligned. Evidence can be edited using the pencil icon or deleted using the “X”. The columns can be sorted as desired and downloaded or printed if desired. Evidence can also be realigned if desired. NOTE: Evidence is time-stamped.
-
Select the "Unaligned Evidence" tab to provide collected evidence statements with alignment to rubric components. Select the evidence statement on the left and select the indicator you would like to align the evidence to on the right. Select the "Align" button in the top right corner. Evidence can be edited using the pencil icon or deleted using the “X”. The columns can be sorted as desired and downloaded or printed if desired. Evidence can also be realigned if desired.
-
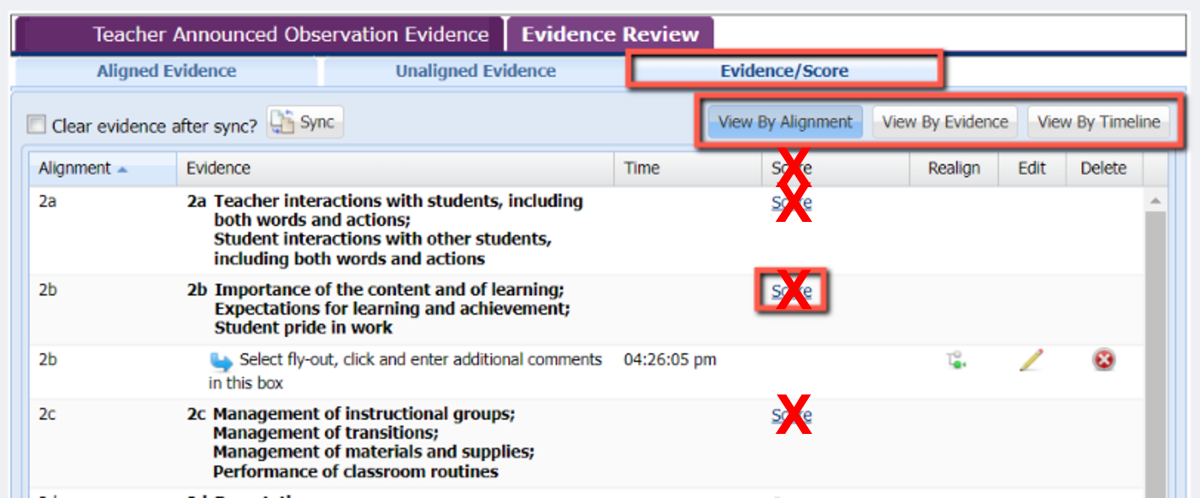
The "Evidence/Score" tab evidence can again be edited using the pencil icon or deleted using the “X”. Evidence can also be realigned if desired. View evidence statements by Alignment, Evidence, or Timeline.
IMPORTANT: The "Score" hotlink function in the Evidence Collection Tool should NOT be used! Rubric levels or area for strength/growth should NOT be indicated for individual evidence statements. Multiple, compiled evidence statements should be utilized to provide feedback utilizing the leveled critical attributes/descriptors of the rubric component.
Sync Aligned Evidence Statements to the Form
Changes in the Evidence Collection Tool are saved as you make them. Use the keyboard shortcut CTRL + Shift + S to save and receive a confirmation of the save. When all evidence is reviewed and aligned, sync the information to place it on the form. Select the Sync button at the top left.
![]()
It is okay to leave the box checked to "Clear evidence after sync" (see box above) – this will clear the evidence from the tool after the sync. You could choose to uncheck the box and have the evidence remain in the tool after it syncs to the form. However, be aware that if you return to the same form and re-sync with the box unchecked the data originally collected will be duplicated.
Forgot to Sync? If you have submitted the form to the educator prior to syncing, head back to the form in question and scroll to the bottom of the page. Select the Edit Form button. This will reopen the form and allow you to sync the evidence from the Evidence Collection Tool. The form can then be resubmitted.
Additional Frontline Education Resources: (Note: You need to be signed in to your Frontline account to access.)
Evidence Collection Tool: Entering Evidence
Evidence Collection Tool: Reviewing and Aligning Evidence
Supporting Evidence Collection and Alignment for Evaluations: Evidence Collection Tool (recorded webinar)