Click the headers of the accordions below to navigate to different sections of this page:
Introduction to the Newly Updated School Directory Management Portal
The School Directory (SD) Management Portal (formerly called the School Directory Update application) has been updated for your convenience and to give it a more modern look, matching its ‘sister’ application, the Wisconsin School Directory Public Portal.
It is very important that every tile appearing on the home screen of the Management Portal is clicked, read, reviewed and edited as needed so that DPI has accurate and current data.
The tiles appearing on a home screen, and their sub-tiles/screens for a private school, are listed within each accordion below.
NOTE: The person making changes to the School Directory Management Portal application must have the user role of “Directory Update." If you do not hold this user role, you must request it from your agency’s District Security Administrator (DSA) or your agency’s Application Administrator. You can make the request, and they can assign this role to you all within WISEsecure.
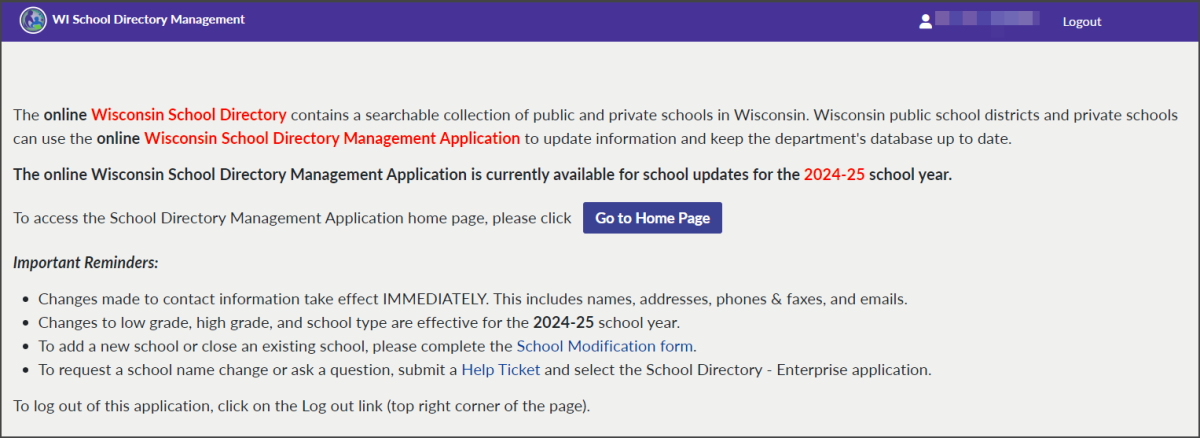
The 'Opening' screen provides users with tips and general knowledge. Read over the information and then click the "Go to Home Page" button.
User Guide
- The Home Screen
-
“Application Open/Closed”
Each year the information submitted to DPI from the school Directory applications is used for a wide variety of purposes. Many people throughout the state create external data requests for Directory based information. Additionally, Directory information is compiled in over 80 reports that get submitted to the U.S. Department of Education.

In order to process data as it changes from one school year to the next, the Wisconsin School Directory Management Portal application has to ‘close,’ meaning that it cannot accept submitted data for that time. This annual event usually takes place sometime between mid-December until about mid-January, when the application re-opens.
If you log into the application during a ‘closed’ period, the icon that appears green and says “Application open” in the screenshot above will instead be a red color and will state “Application closed.” While you will be able to log in and view the home screen, as long as the icon reads “Application closed”, users will not be able to make any data edits within the application.
If you have an urgent change to be made to your Directory information, but the application is Closed, please submit a Help Ticket. Select ‘School Directory Updates” from the application drop-down list, and explain your needs in the free text field.
It is also important to note that when the School Directory Management Portal reopens (again, roughly in January of each calendar year), that the Directory is then accepting information for the following school year. For example, when the School Directory Management Portal opens in February of 2024, it is open to accept data for the 2024-25 school year (even though February, 2024 is still in the calendar time frame for the 2023-24 school year).
“Manage Data” Icon and the “Submit Review” Button
Follow all the steps provided within the User Guide sections below. To edit and update information in the School Directory Management Portal, you'll need to click the purple pencil icon in the upper right corner of each tile that appears on your home screen. This is referred to as a 'Manage Data' icon through the user guide. Clicking this icon will bring you to screens where you can edit and update your School Directory data.
Do not click the 'Submit Review' button until you have reviewed and updated data on all tiles and screens within the School Directory Management Portal application. If you submit data that has not been reviewed, you will likely receive validation messages.
The Home Screen and Breadcrumbs as Navigation:
The home screen of the SD Management Portal displays all of the tiles you are responsible for reviewing with each new school year. Smaller changes that occur through the year can be made periodically during the application’s “Open” time frame. To edit information on any tile, you must click the ‘Manage’ icon: a small pencil in the upper right corner of each tile. Clicking the Manage icon in the upper right corner of each tile will open a new screen. All screens are editable except for the basic information screen.
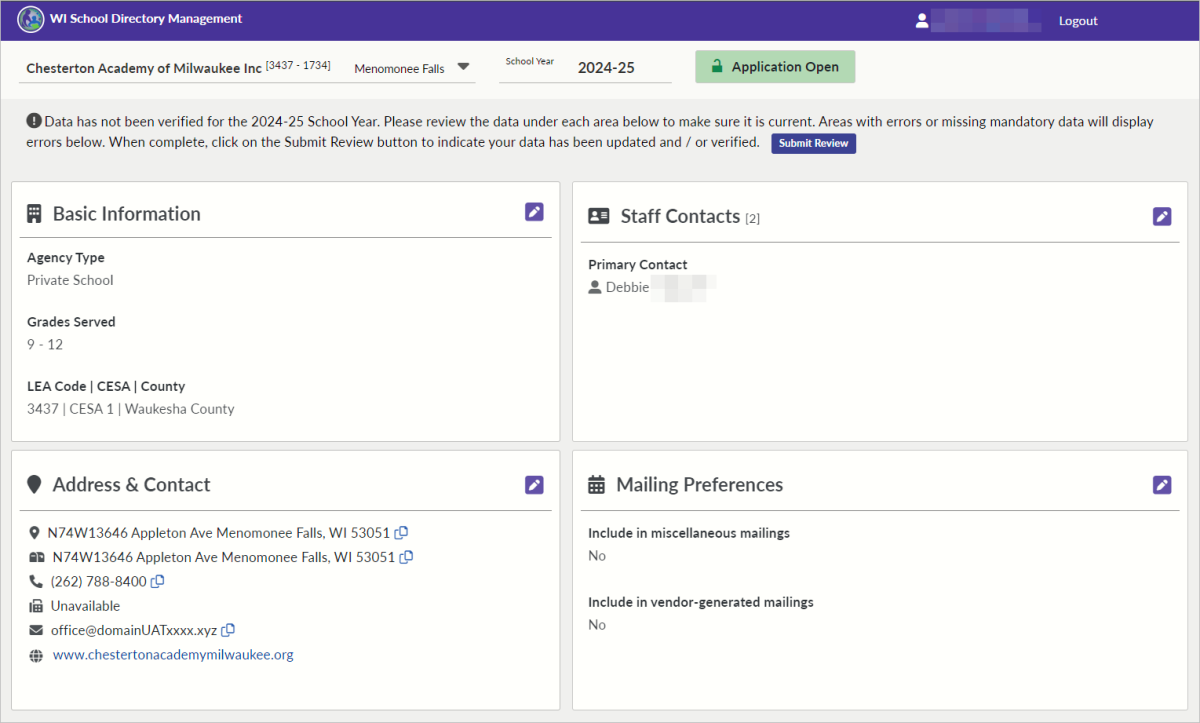
A message across the top of the Home screen will inform you of the progress of your data review. If you have not started your data review, the Home screen will indicate that you data has not been verified.

Once you begin your data review, the Home screen message will change to indicate your progress.

To edit information on any tile, you must click the ‘Manage’ icon. Clicking the Manage icon in the upper right corner of each tile will open a new screen. All screens are editable except for the basic information screen.
The tile headers are used to create the ‘breadcrumbs’. Breadcrumbs are a list of screen names, separated by a ‘caret’ (>) symbol. They will appear across the top of every screen. Use the breadcrumbs to navigate through this application.

Clicking a word in the breadcrumb trail will take you to that screen. The breadcrumbs displayed are dynamic and change as you navigate screens. The breadcrumb path always starts from the ‘Home’ screen. Click the word ‘Home’ to return to the home screen at any time.
The number of tiles appearing on the home screen depends on the type of agency accessing the SD Management Portal (i.e., public LEA, CESA, County CDEB, private school, State Agency Institute, or ICS Governance Board). For information on Agency Types that report through the School Directory Management Portal, visit the School Directory Management Portal: User Guide landing page.
Every time the “Manage” icon appears in this user guide, you will get a numbered list of tasks to complete on that screen:
To Manage:

- Pay attention to the “Manage” icon throughout this user guide.
- Basic Information Tile
-
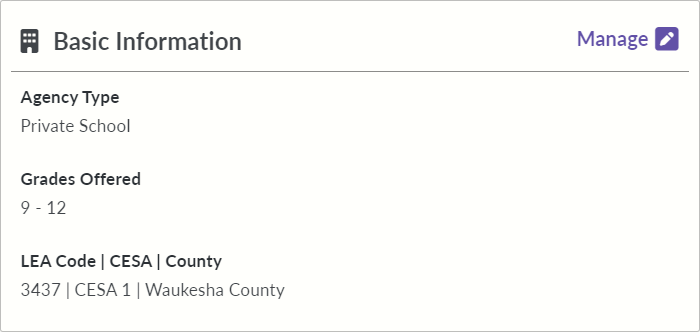 This is an editable tile. It allows users to edit displayed information after they click the “Manage” button.
The information on this tile and its corresponding screen reflect agency level information. Of note, building level information is typically the same as agency level information for a private school, since the private school is the entirety of the agency.
Basic Information Tile Screen
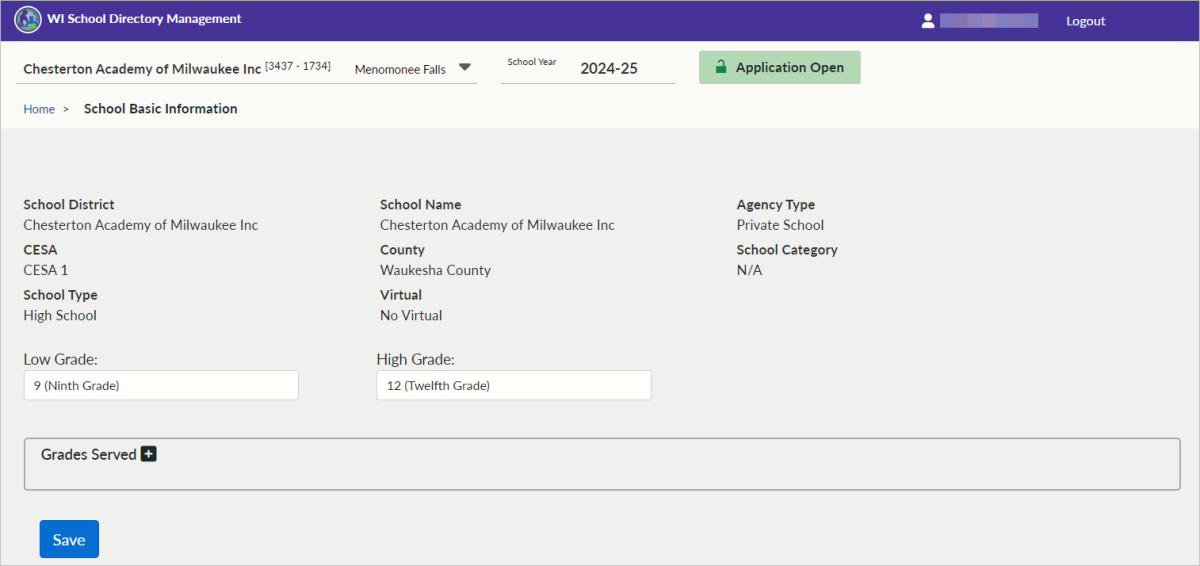
This is an editable screen. Changes needed to the items bolded at the top (School District/Agency Name, School/Legal Name, Agency Type, CESA, County, School Type and Virtual Options) must be requested through a Help Ticket. The person submitting this ticket must have the user role of “Directory Update” because this role signifies they have authority to request these changes.
- Visit the Agency Name data element page for information about School District
- Visit the Legal Name data element page for information about School Name
- Agency Types that report through the School Directory Management Portal are defined on the School Directory Management Portal: User Guide landing page.
- CESA data element page
- County data element page
- School Type data element page
- Virtual School Status data element page
- Customer Services Team Help Ticket: click this if you need information changed on the School Directory School Basic Information screen that you cannot edit yourself.
Low Grade and High Grade:
These values are set based on the parameters given from each of the schools within your agency. This is done on the Basic School Information screen by clicking in the fields for Low Grade and High Grade, and making your selection. Selections will be highlighted in blue.

NOTE: The lowest possible grade is four-year-old kindergarten. PK is not a grade level, as it is not defined as a grade by state statute 115.02.
- Visit the Low grade/High grade data element page for more information.
Grades Offered:
You’ll notice an expander icon for this section. It looks like a ‘plus’ sign. The plus sign indicates there is more to see. Once clicked, the window expands and displays a list of all the grade levels offered across all the schools within your agency, again, based on the parameters given from each of the schools within your agency.
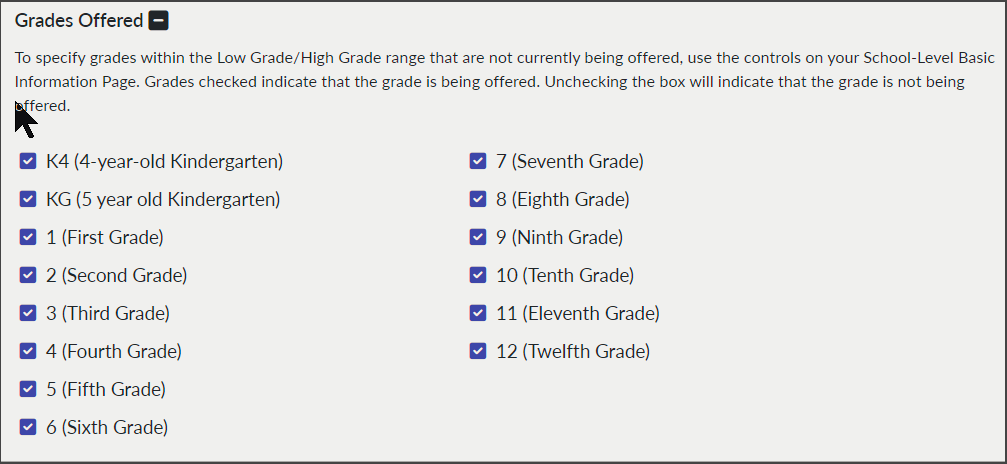
- Visit the Grades Offered data element page for more details.
- NOTE: Private schools cannot offer PK. Visit the Grade Level Placement data element page for more details on PK.
To Manage:
-
Make note of anything from this screen that is incorrect and submit a Help Ticket to get changes made to any content on this screen besides grade level.
-
Remember, the person making changes to the School Directory Management Portal application must have the user role of “Directory Update." If you do not hold this user role, you must request it from your agency’s District Security Administrator (DSA) or your agency’s Application Administrator. You can make the request, and they can assign this role to you all within WISEsecure.
-
-
Ensure your grade level information is accurate.
-
Click 'Save' if you make any changes.
-
Click ‘Home’ from the breadcrumbs, and move on to the Address and Contact Person Tile on the home screen.
- Address and Contact Person Tile
-
 The Address and Contacts tile is below the Basic Information tile on the home screen.
The information on this tile and its corresponding screen is agency level information.
Update Address and Contact Tile Screen
This screen is editable. Changes need to be made to any and all fields that require updating.
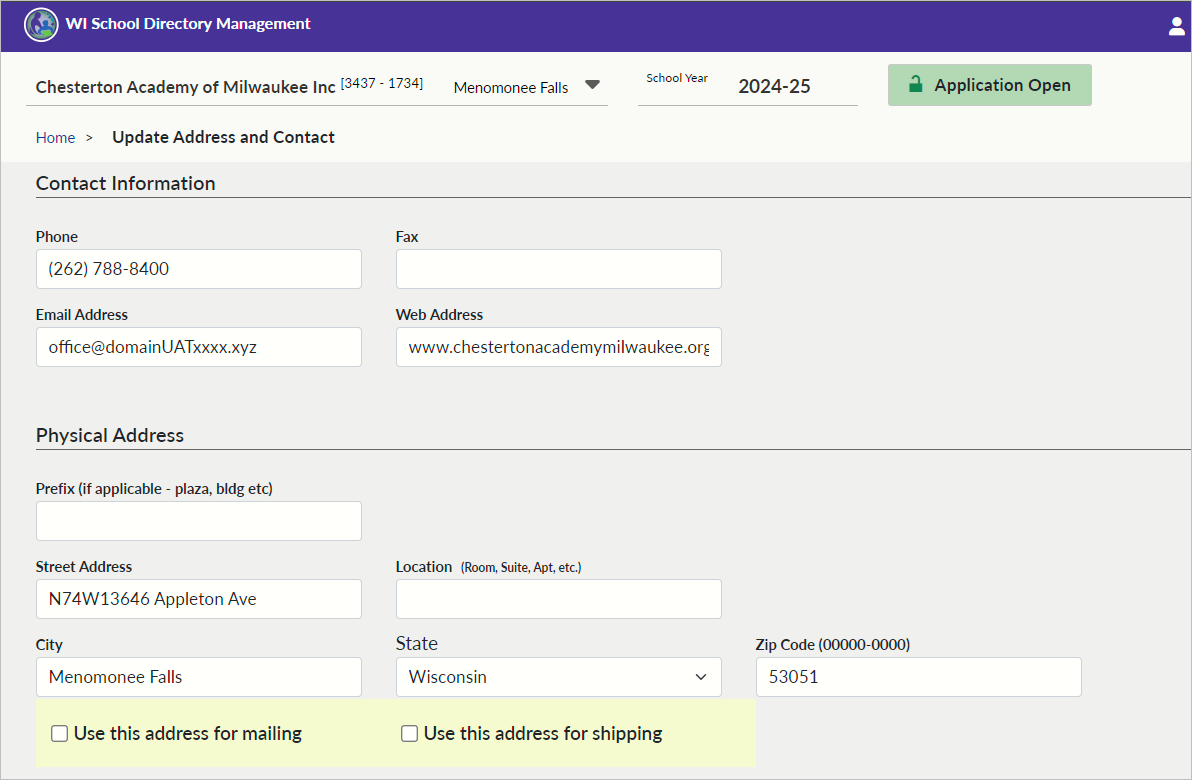
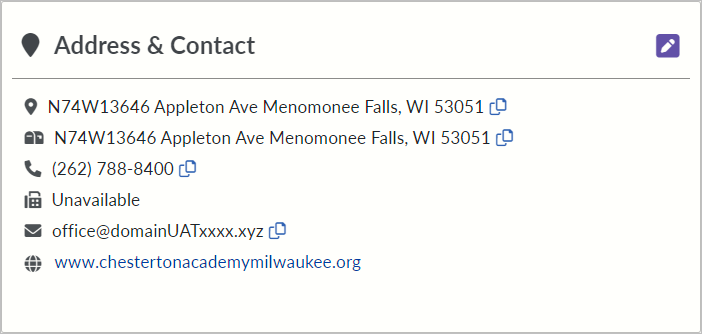
For the Contact Information section, remember to provide agency level information for the following fields: Phone, Fax, Email, Web address.
- For more details about these fields, please visit the Contact Information data element page.
To Manage:
-
Review the accuracy of your contact information.
- For private schools, the person listed here should be either for the Choice Administrator, or the Private School Primary Contact. This is the name of the person who will appear on the home screen Staff Contacts tile.
There are also three address types to manage on this screen: physical, mailing, and shipping.
For the Physical Address section, remember to provide agency level information for the following fields: Prefix, Street Address, Location, City, State, Zip Code.
- For more details about these fields, please visit the Address data element page.
Notice the boxes at the end of the physical address section. Some private schools also use their agency level physical address (e.g., ‘Central Office’ or ‘Main Office’ address) as the mailing address and the shipping address for the agency.
You may choose to check one, both, or neither of these boxes as they apply to your agency level needs.
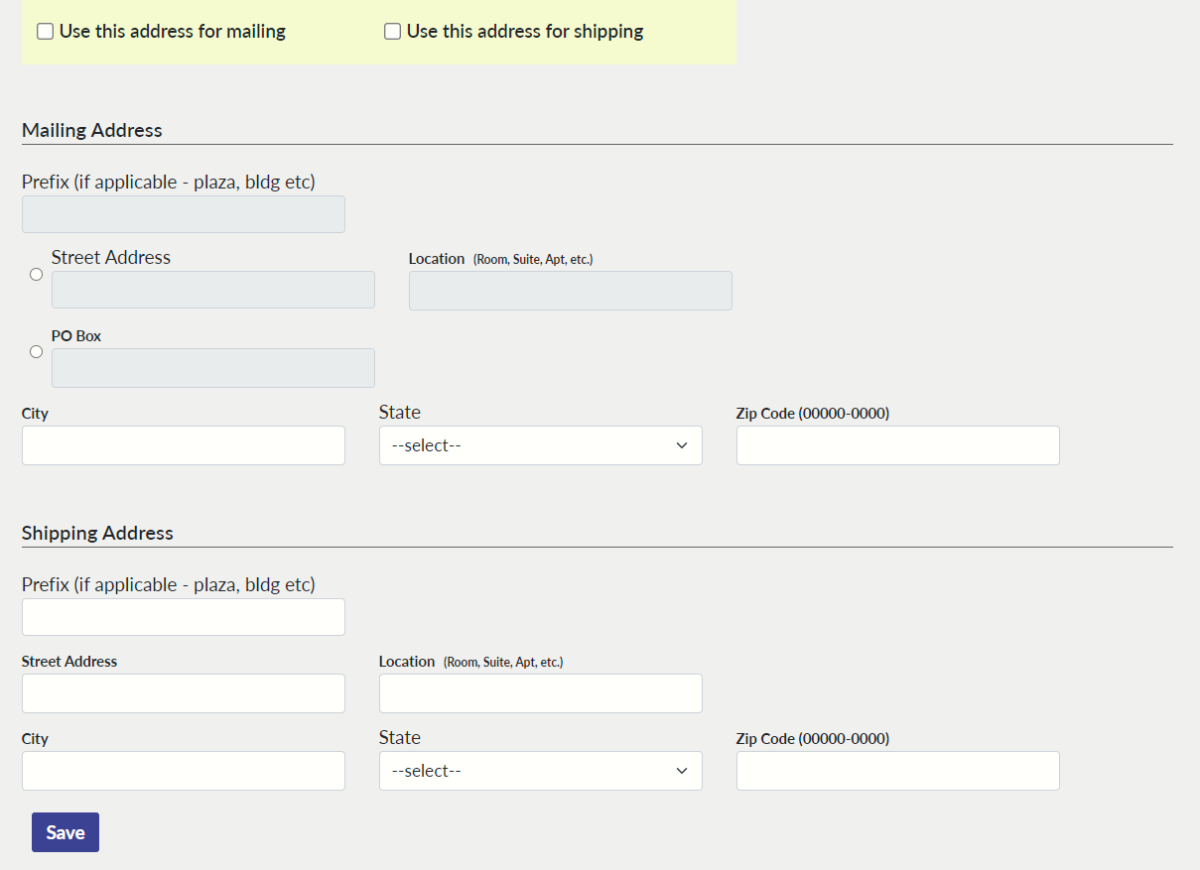
- Mailing Address: check box available if same as physical address
- Shipping Address: check box available if same as physical address
If both boxes are left unchecked, you will need to enter information for both the mailing and shipping address.
To Manage:
-
Review the accuracy of your address/es.
-
Make sure you follow the details provided about location if your agency's location is in a difficult to locate area.
-
Either click the buttons to make the mailing/shipping address the same as the mailing address, or enter separate mailing/shipping address information.
-
Save changes.
-
Click ‘Home’ from the breadcrumbs, and move on to the Staff Contacts Tile.
- Staff Contacts Tile
-
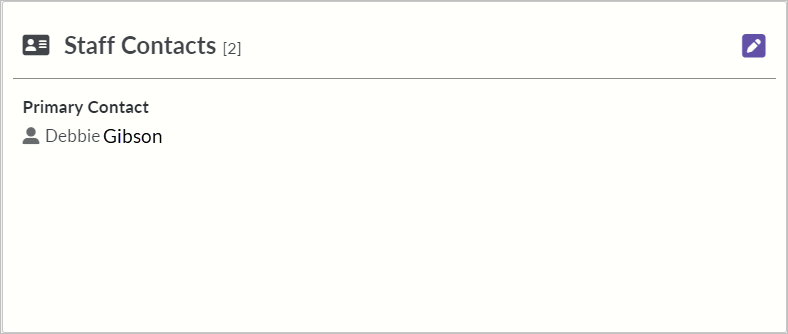 The Staff Contacts tile displays the agency level contact that was provided on the previous tile, the Address and Contact Person tile. This should be the person holding the role with the most authority within your school/ agency. For private schools, the person listed here should be the Choice Administrator or Private School Primary Contact.
This tile brings you to the Staff Contacts screen. There are a number of mandatory contact types required by DPI. If you are missing any, you will see a notification on the home screen Staff Contacts tile.
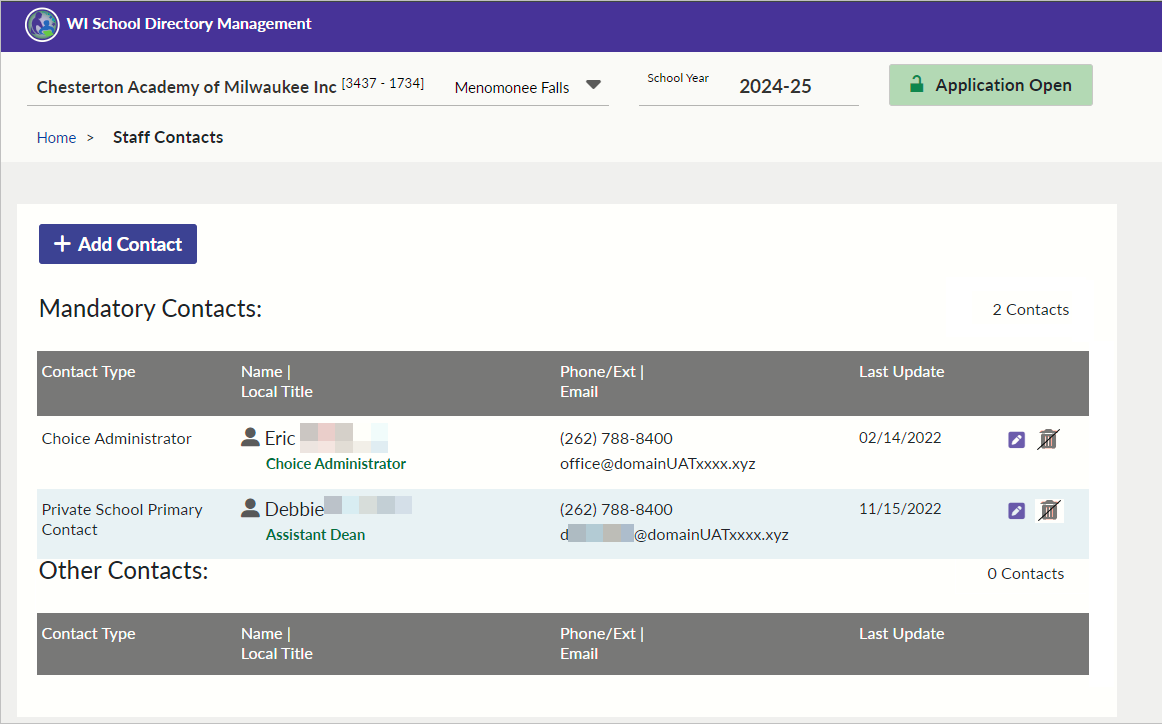
Mandatory Contacts Tile Screen
This screen is editable. Make changes to any and all fields that require updating. Address any notifications posted across the top of the screen for missing contact types.
For the Mandatory Contacts section, remember that this is still information required for the agency level. This will likely be the same as school level contacts.
Mandatory Contacts for a private school Include:
- Choice Administrator
- Private School Primary Contact
- Visit the Staff/Mandatory Contacts data element page for more information.
 Based on state statutes and other regulations, collecting contact information from various staff positions is required of DPI. These positions can and should be edited to ensure you submit current and accurate contact information to DPI. These same contacts cannot be deleted because they are required. As such, the edit icon is visible, but the trash can (‘delete’) icon is not available. When a specific contact type, such as the Choice Administrator, displays these icons, it indicates that it is a required position.
To Manage:
-
Review the accuracy of your mandatory contact information.
-
Click the purple edit icon to make changes.
-
Click the “+Add Contact” button to add any missing mandatory contacts. Steps provided below.
Add Contacts Screen
 Each Agency Type has a specific list of mandatory contacts, as listed above. If your agency does not have anyone listed for a given mandatory contact, you will need to provide the information into the Directory. You can do this by clicking the “+ Add Contact” button. Once you click the “+ Add Contact” button from the Staff Contacts screen, the Add Contacts screen will display. This should be annotated in the breadcrumbs: Home > Staff Contacts > Add Contact.
- Visit the Staff/Mandatory Contacts data element page for more information.
To add a new contact, complete the following steps:
- Select the Contact Type for all required mandatory contacts, especially if they are missing.
- Select an appropriate Local Title. If your specific Local Title is not available in the list, please submit a Help Ticket to the Customer Services Team.
- Enter: First Name*, Last Name*, Middle Name, Gender, Suffix, Position Status*, Phone Number*, Phone Extension, Fax Number, and Email* for the current contact person. Items marked with an asterisk are required.
- For more information, visit the Staff/Mandatory Contact Type data element page.
- For position Status, if the position is neither vacant nor an interim, leave that field blank.
- Below these fields there will be three buttons: Cancel, Clear, Add.
- Click the “Add” button to save the new Mandatory Contact.
To Manage:
-
Add all required contacts.
-
Return to the Staff Contacts screen using the breadcrumbs to make sure your new contact appears in the listing.
-
Repeat as needed until all mandatory contacts are listed.
-
Return to the Staff Contacts screen using the breadcrumbs to review the Other Contacts section.
Other Contacts
Below the list of mandatory contacts are additional positions that you can post as other contacts. Again, make sure you are adding agency level contacts on this screen.
To Manage:
-
Ensure all other contacts listed are accurate and current.
-
Edit or delete as needed for an accurate display of agency level staff positions.
- OPTIONAL: Add additional other contacts.
NOTE: Click ‘Home’ from the breadcrumbs, and move on to the Mailing Preference Tile when all Staff Contacts have been managed and updated to reflect current school year data.
- Mailing Preference Tile
-
 This Mailing Preference tile appears on the home screen below Staff Contacts. The Department of Public Instruction (DPI) generated separate education-related mailings in addition to required forms. Vendors sometimes request database-generated address listings for use in distribution of non-DPI mailings. Private schools have the option to not be included in such mailings. If the private school elects to participate in a federal program (e.g., IDEA, or Title I, etc), DPI maintains the right to contact that private school regarding the implementation of the federal program.
The information on this tile and its corresponding screen is agency level information.
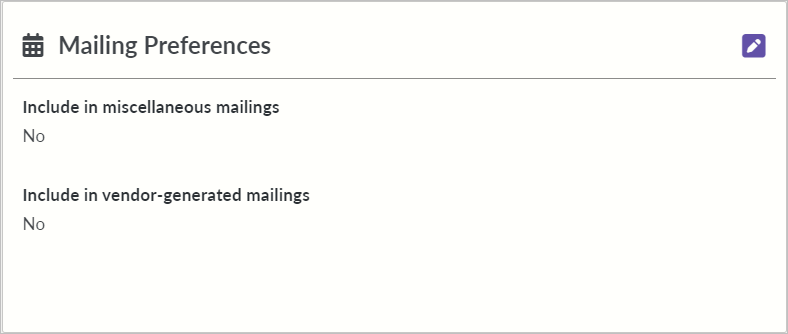
Mailing Preferences Screen
This screen is editable. Make sure your selections are correct for each of the two options:
- Yes or No: Include (this school) in miscellaneous DPI mailings.
- Selecting Yes means: your school will receive miscellaneous communications and mailing from DPI.
- Selecting No means: your school may not receive notification of state and federal funding opportunities that DPI sends out.
- Yes or No: Include (this school) in vendor-generated mailings.
- Selecting Yes means: your school will receive miscellaneous communications from vendors.
- Selecting No means: your school will not be in the private schools file which DPI posts on its website. Many scholarship agencies and free services use this file for their mailings, so your school will not receive notifications of some scholarship and free services.

To Manage:
-
Make your selection for each of the mailing options.
-
Click 'Save'.
-
Click ‘Home’ from the breadcrumbs, and return to the home screen.
- Yes or No: Include (this school) in miscellaneous DPI mailings.
- Return to Home Screen: Submit Review Button
-
Across the very top of the home screen is an instructional message.
It reads:
Data has not been verified for the 2024-25 school year. Review the data on all tiles and subsequent screens, make changes as needed, and save your changes. Areas with missing mandatory data will display an error message. When done, click the Submit Review button to mark that your data has been managed.
Clicking this “Submit Review” button indicates to DPI that you have reviewed (updated and saved) all data for the current school year. You have clicked every tile from the home screen and gone through every screen, saving changes as updates along the way.
Clicking this “Submit Review” button means it’s time to celebrate Data Quality! Woo Hoo!!
Once you click this button, you can still make changes with the SD Management Portal as needed until the application closes (typically, at the end of each calendar year). The application opens again within a few weeks of the closing.
- Visit the Submit Review data element page for more information.
For more information, visit the School Directory Management Portal: Annual Required Updates webpage.
Didn't Find What You Needed?
The Customer Services Team is here to help!
Please submit a Help Ticket so we may better assist you.
Choose “School Directory - Updates” from the Application dropdown, and one of our dedicated support staff will reach out to you.