In WISEsecure, DSAs and application administrators can assign user roles for multiple applications at a time using the Mass Delegation tool. Mass Delegation is a flexible, powerful tool, so we recommend that you review the step-by-step instructions below before you begin.
We recommend that you use Google Chrome when you access the Mass Delegation tool.
How the Mass Delegation Tool Works
The Mass Delegation tool in WISEsecure lets you assign roles to multiple users at once, for multiple applications at once. For example, you can assign several new teachers their necessary user roles for the Classroom Data Tool, CTEskills, and WISEdash for Districts all at once, rather than needing to assign each user's roles individually. To do this, the Mass Delegation tool uses templates of roles that you can create in WISEsecure. For example, you could create a "Teacher Template" that includes the necessary user roles for a new teacher at your agency, or an "Administrator Template" for new WISE administrators. The steps to create a new template are covered below.
Using the Mass Delegation Tool
Open the Mass Delegation Tool
1. Log into WISEhome using your WAMS ID or a district or agency email account.
2. In WISEhome, select the WISEsecure application.
3. In WISEsecure, select Advanced from the menu bar, then select Mass Delegation to open the mass delegation tool.

Find and Select Users
On the Mass Delegation page, in the Select Users section, click Add Users to choose which users to assign application roles. The Search Users window appears. In the Search Users window, you can either look up multiple users at a time by email, or search for individual users by email, first name, or last name.
To look up multiple users at a time by email:
1. Select the Lookup multiple users by emails (exact match) tab. Enter a list of email addresses separated by a comma (,), semicolon (;), new line, space, or tab.
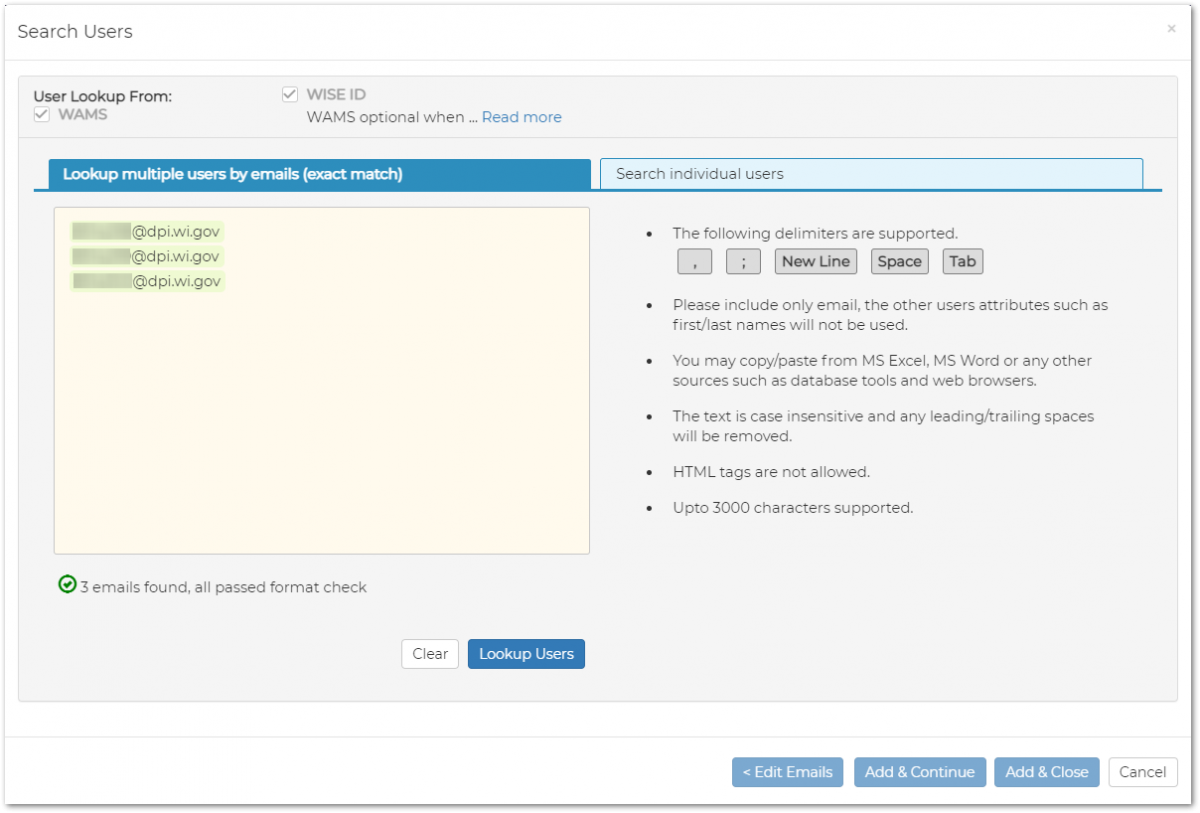
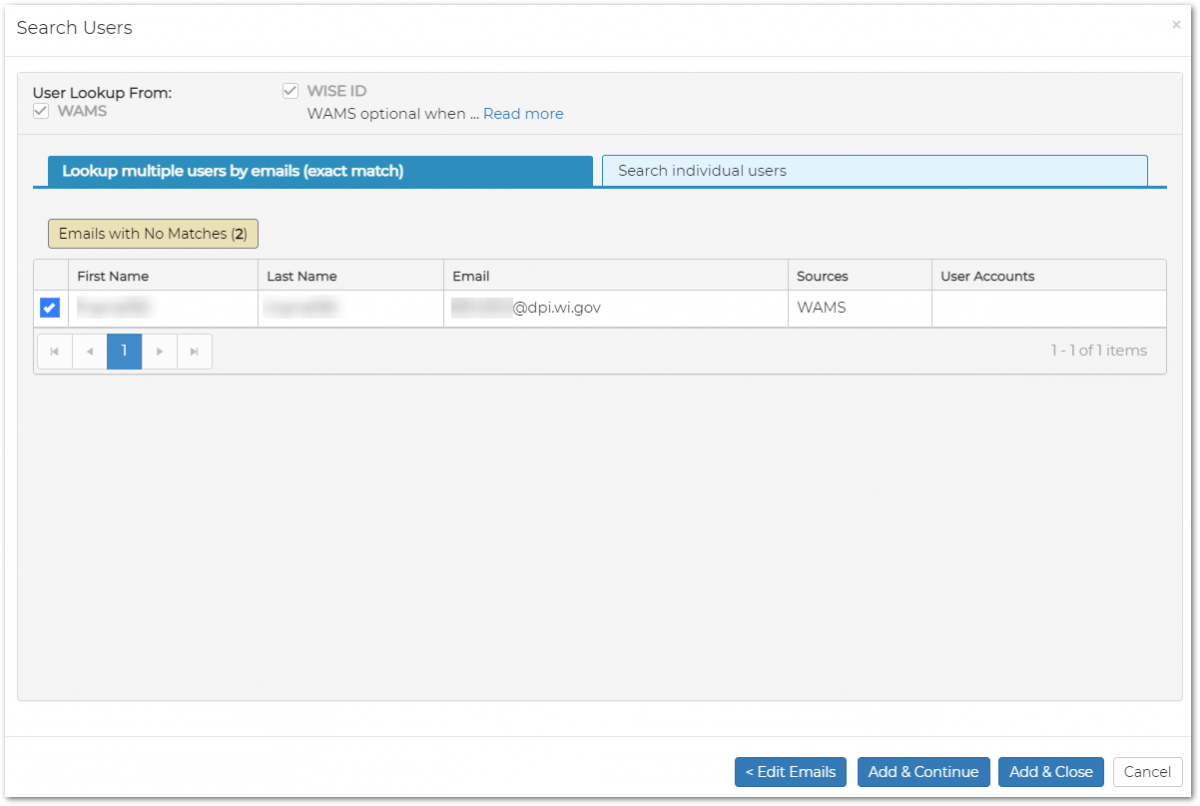
2. Click Lookup Users to search for users that match the email addresses you entered. In the search results, select the users you want to include by clicking the check box in the user's row. Once you've selected at least one user, click Add & Continue to add the selected users to the list and search for more users, or click Add & Close to add the users and close the Search Users window. Click Emails with No Matches to see email addresses that did not map to any users in the WISEsecure.
To look up individual users:
1. Select the Search individual users tab.
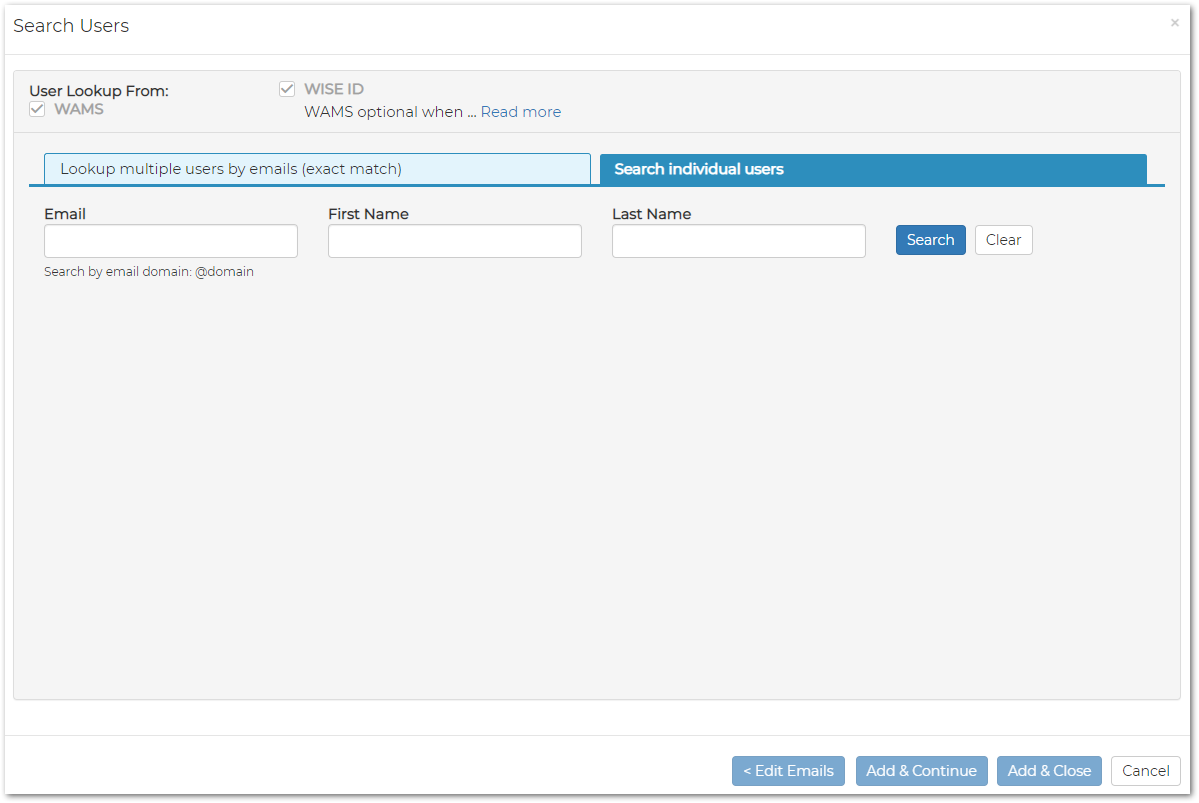
2. Enter a user's first name, last name, and/or email address and click Search.
3. Select the users you want to include by clicking the check box in the user's row. Once you've selected at least one user, click Add & Continue to add the selected user to the list and search for another user, or click Add & Close to add the user and close the Search Users window.
Once you've selected users, you can click the number of users in the Select Users section (such as 2 Users in the below screen shot) to see which users you've selected.

Select Application Security Templates
1. Next, go to the Select Application Template section and click Select Template. The Select Template window appears.
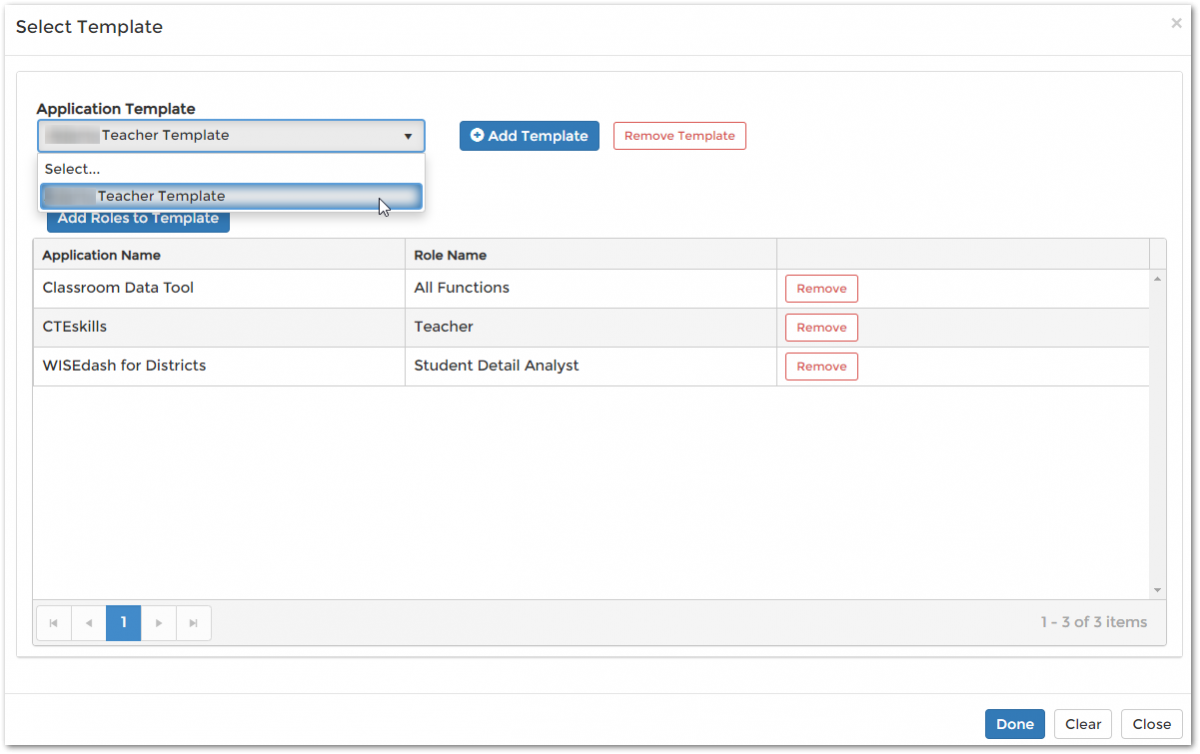
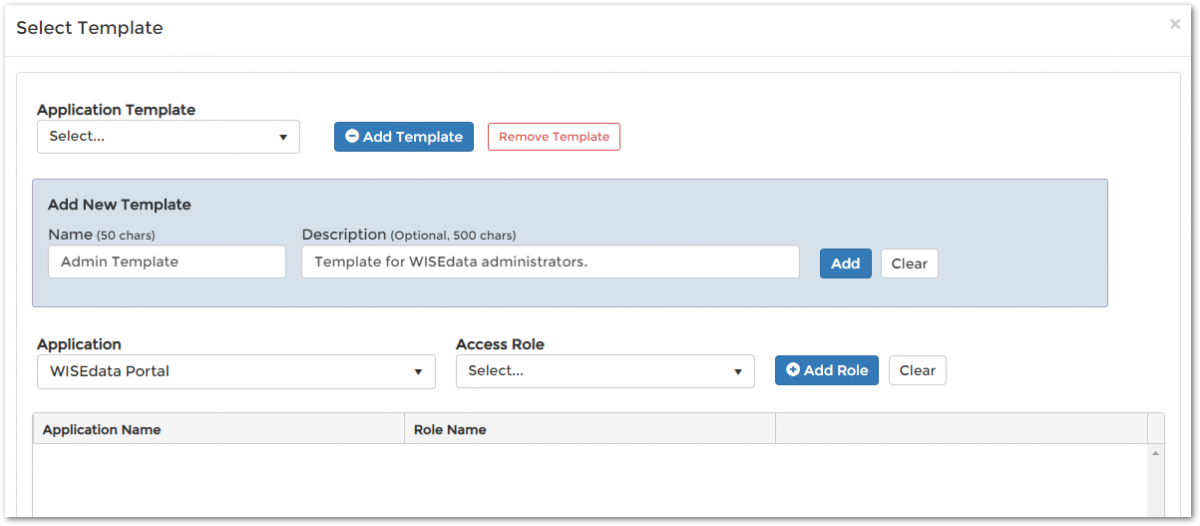
2. In the Select Template window, select a template from the Application Template menu. Or, to create a new template, click Add Template.
- After you click Add Template, enter a name and an optional description for your template. Then, select the applications and roles that the template should include before selecting Done to save the template.
3. After you've selected a template, the Select Application Template section now shows new information. You can see the name of the selected template and how many roles and applications the template includes. The section also shows you whether any of the included applications support multiple roles or school-specific role assignments.

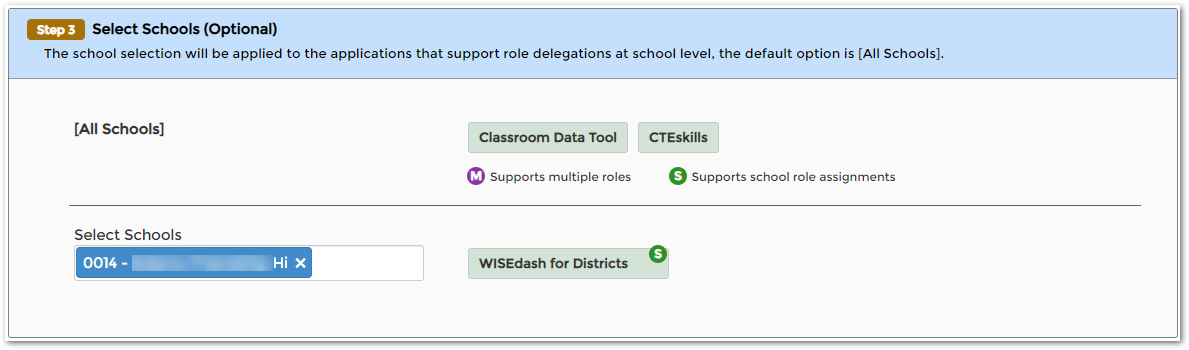
Assign Roles for Specific Schools (Optional)
If any of the applications included in the selected template allow school-specific role assignments, you can select those assignments in the Select Schools (Optional) section. The section shows which application assignments are for all schools, and which you can assign on a per-school basis. Select schools from the Select Schools menu to assign roles for those specific schools, or leave the Select Schools field blank to assign roles for all schools in your district.
Finish Assigning Roles
Once you're done, click Submit at the bottom of the screen to apply the selected template's application roles to the selected users' accounts.
Using Templates in the Mass Delegation Tool
LEAs with access to WISEsecure can access templates created by DPI and shared with LEAs in the Chose DPI Shared Template tab.
LEAs also have the ability to make their own template.
To create a template:
- Access the Mass Delegation tool from the Advanced menu.
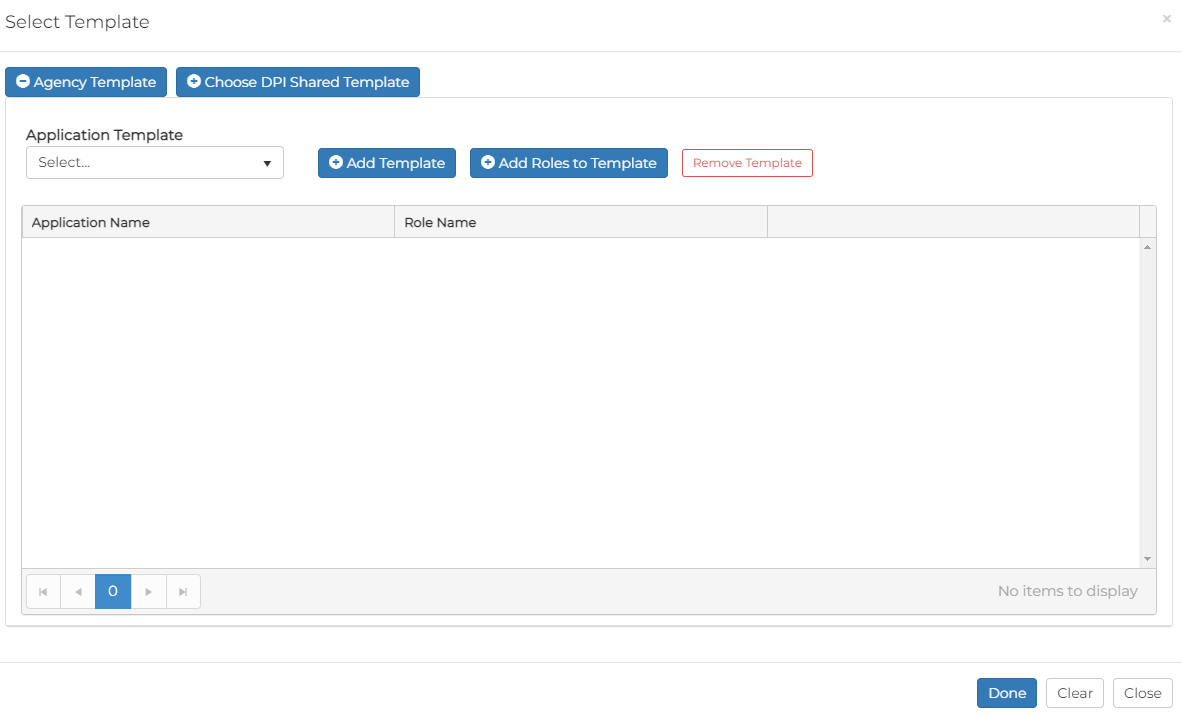
- Click the blue Select Templates button.
- In the pop-up window select Add Template.
- Enter a name for your template in the Name box. You may also include a description if you wish, but that is optional.
- Click the Add Template button to save.
- Next, click the Add Roles To Template button. Two drop-down boxes now appear.
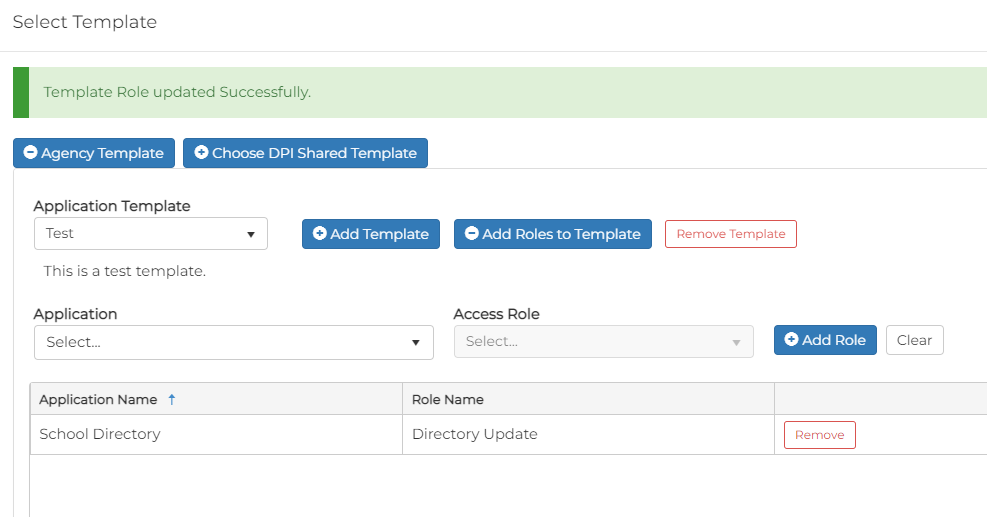
- Select an application from the Application drop-down, and a corresponding user role from the Access Role drop-down.
- Click the Add Role button.
- Repeat this step for every app you would like included in your template.
- When all of the desired apps and user roles appear on the list click the Done button at the bottom. You may now use this template at any time.
Resolving Role Assignment Conflicts
If you attempt to assign a user a role for an application they already have a role assigned for, and that application does not support multiple roles, the Resolve Conflicts section appears.
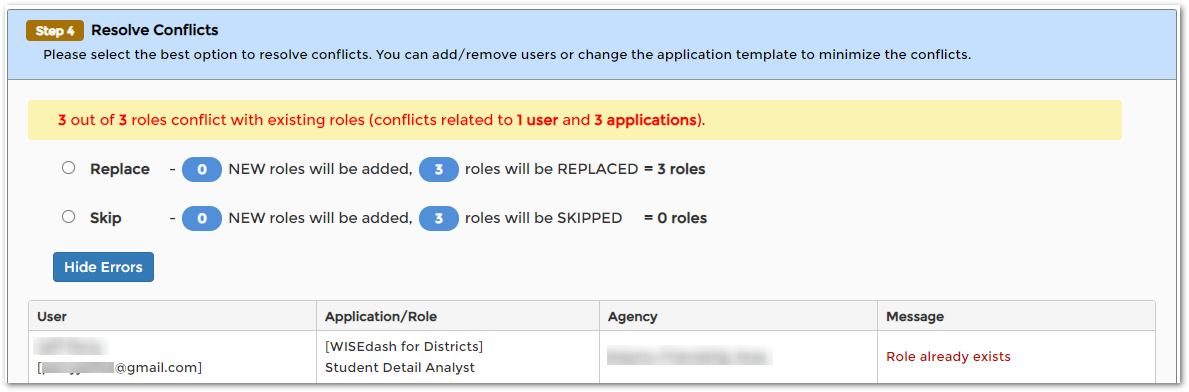
In the Resolve Conflicts section, you'll see a table of role conflicts for each included user, as well as a message indicating what the conflict is. You can then choose how to resolve the conflicts:
- Select Replace to remove the user's current roles and replace them with the new role assignments.
- Select Skip to keep the user's role assignments are they currently are.