Recording and Transcribing Your WISEdata Conference Presentation
![]()
For the 2023 WISEdata Conference, DPI asks that conference presenters record and transcribe their presentations so that they are available for attendees to rewatch or to be watched later by people who couldn't attend. The majority of our presenters will be presenting live we have selected two session topics to be presented live with a virtual option.
You will present your session live during the WISEdata Conference and record and transcribe the live presentation.
This page includes instructions for how to record and transcribe a Microsoft Teams webinar.
You can also refer to the video walkthrough of the recording and transcribing process to see the Teams recording and transcription in action.
 WISEdata Conference Resource Persons Roles & Responsibilities Cheat Sheet
Recording Your Presentation
1. First, join the Microsoft Teams meeting for your session.
- If you have chosen to pre-record, you can create a meeting with just yourself as the only presenter or attendee at any time. You can start a Teams meeting with just yourself by creating a Teams meeting on your own Outlook calendar, then joining through that meeting link.
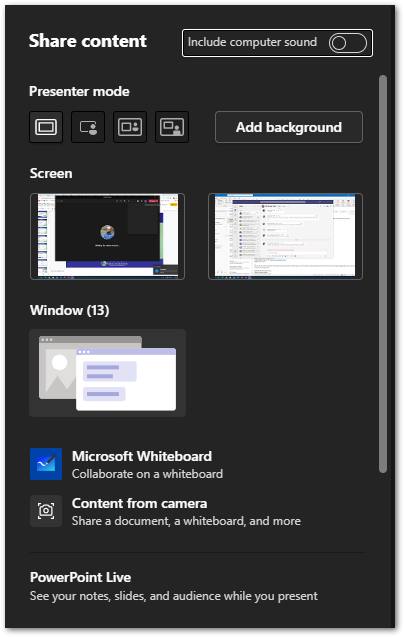
2. Once you've started the Teams meeting, share your screen. To do so, click on the Share content button in the top-right of the meeting window.

In the Share content menu, you can choose whether to share your whole screen (under the Screen section) or a specific window (under the Window section). If your presentation includes a demo, it's best to share your whole screen to ensure the demo is included in recorded presentation.
3. When you're ready to begin your presentation, start the recording and transcription. To do so, go to the More actions menu (the three dots at the top of the meeting window) and select Record and Transcribe then select Start recording. This will start both the recording and speech-to-text transcription with one click.
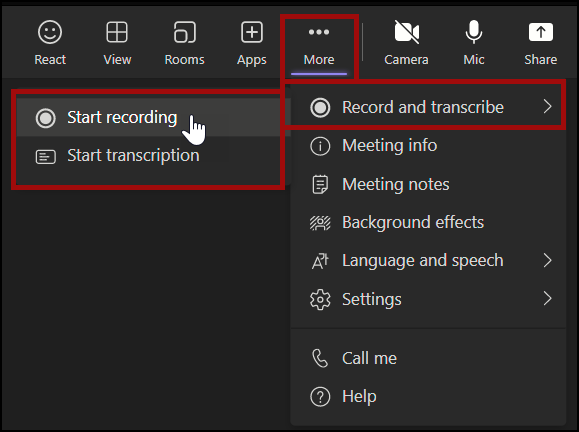
4. At the end of your conference session, stop the recording and transcription. To do so, go to the More actions menu again and select Stop recording, which appears in the same place as the Start recording button.
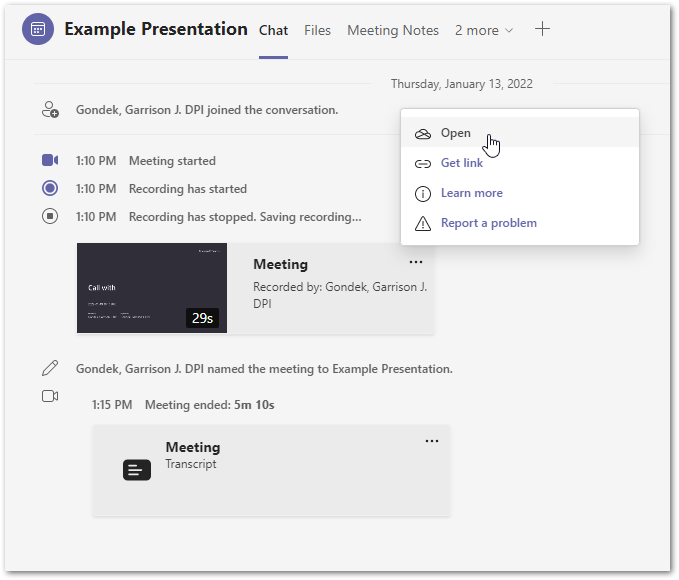
5. After Microsoft Teams has processed your recording and text transcript, they will appear in the meeting chat. Please note that this can take some time, even an hour or more for a longer presentation, so if they have not appeared yet, please check back later.
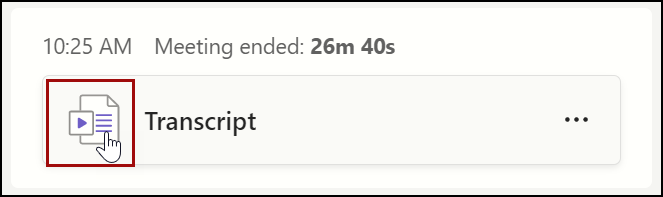
6. To download the video recording, select the three dots next to your meeting video in the meeting chat, and go to Open. The video will open in OneDrive.
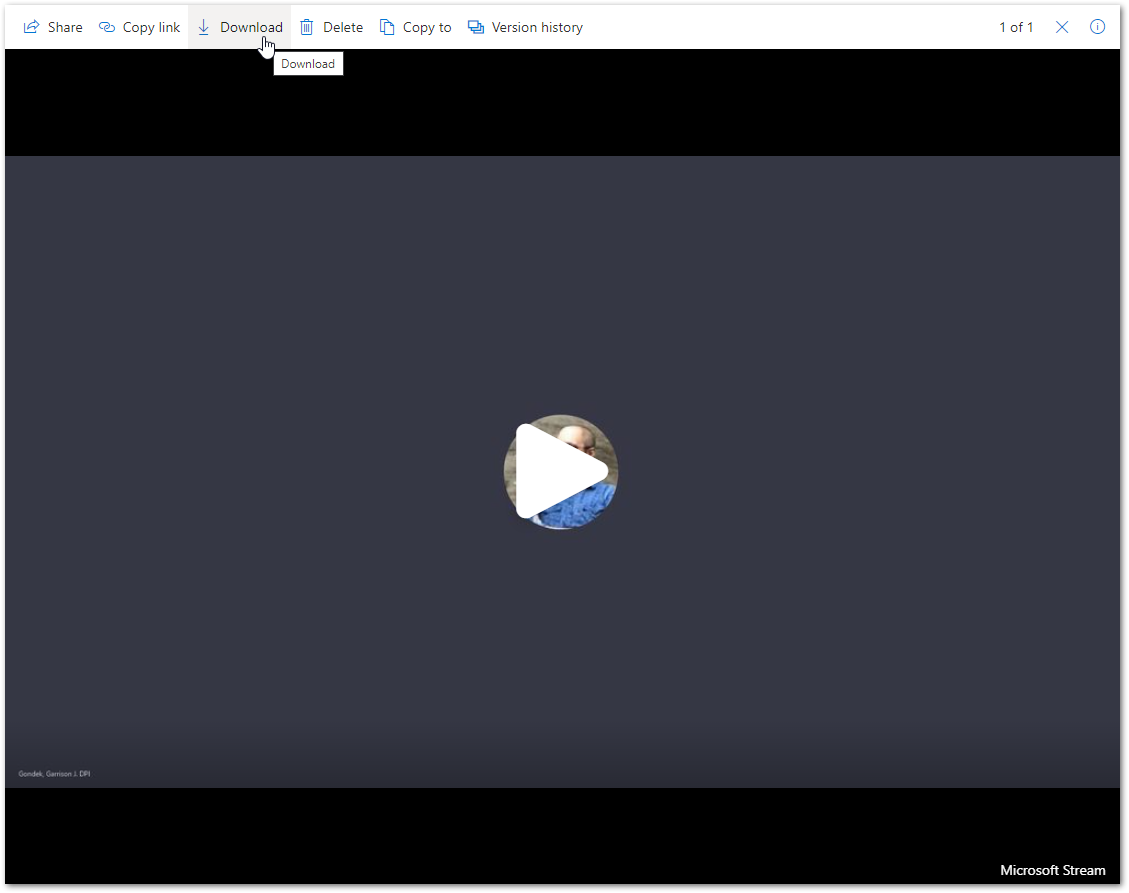
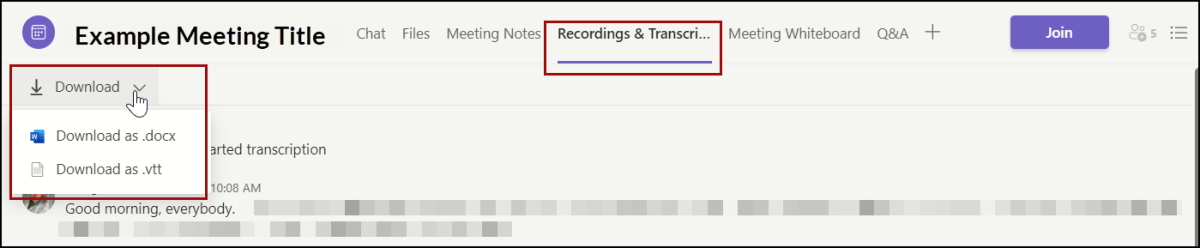
7. In OneDrive, select Download at the top of the screen to download your video recording.
8. Next, download the transcript. To do so, click the three dots next to the transcript file in the meeting chat, and select Download as .vtt. Please note that it is important for the transcript file to be a .vtt and not a .docx, as this file type is necessary for the transcript to be joined with the video.
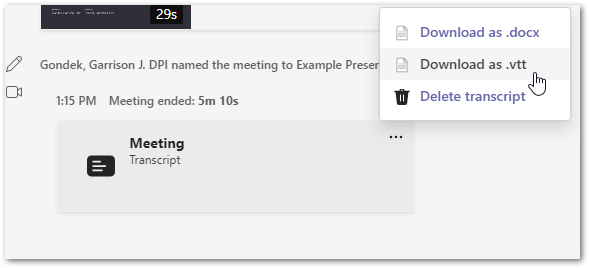
If your transcript doesn't download just by clicking the three dots, then click the transcript icon itself. This will open your transcript as a file within Teams. From the menu bar across the top, you can click Download.
9. Review and edit your transcript. The speech-to-text transcription in Microsoft Teams is fairly accurate, but it isn't perfect and will make mistakes, especially with names or technical terms. To review your transcript, open the .vtt file in NotePad. Then, review the text and edit any mistakes you find.
- While you are editing your transcript, do not edit or remove any of the time stamps in the file. These time stamps are how the .vtt file can be synced to the video. You only need to edit the actual text of the transcription.
- TIP: Use Ctrl + H to Find and Replace commonly misspelled words.
- Save your edits in the NotePad file.

10. After you've edited and saved your transcript, you should rename the recording and the .vtt file to match the title of the slide deck you've presented.
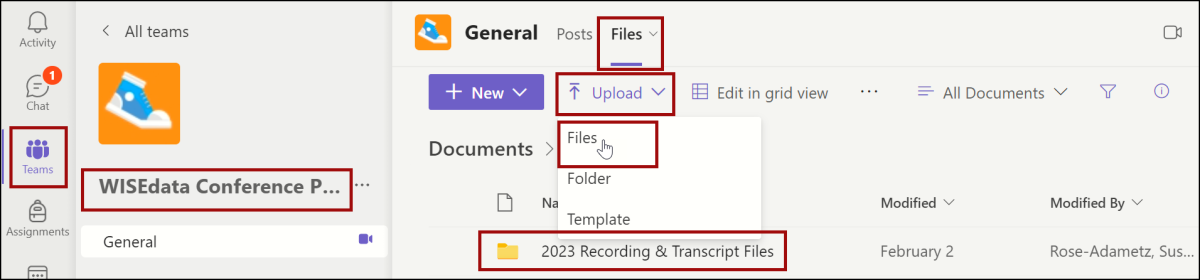
11. Now you're ready to upload your video and transcript files for processing. To do so:
- Open the WISEdata Conference Planning Teams channel.
- Click "Files" and click the "2023 Recording and Transcript Files" folder
- Click "Upload" "Files" then locate your.vtt file from the location you saved it. Click "Open" to upload the .vtt file into the "2023 Recording and Transcript Files" folder.
If the file upload is unsuccessful, please try again.
Once your files are uploaded to the correct folder, you're done! Thank you for your work in preparing your presentation for the WISEdata Conference.