WISEdata Portal Message Center

The WISEdata Portal menu displays horizontally across the top of the screen with menu items listed in a purple banner and dynamic tabs within each menu. The default screen for WISEdata Portal is the Agency menu, Data Quality tab.
The Message Center feature is especially useful when multiple schools/districts have enrollment records for one student (i.e., overlapping enrollments).
![]()
Click the links below to navigate to different sections of this page:
Message Center Screen
View messages on this screen.You will see a “New” icon when you have unread messages in your Message Center. Messages are visible to every person in your agency with access to WISEdata Portal.
You can make the selection to view:
- All messages
- Messages you sent
- Messages you received
- Messages that have been resolved

Clicking the hyperlinked WISEid will bring you to the specific Student Detail screen for that student.
Clicking the hyperlinked message subject will open the message as a pop-up and display the message content.

You can reply to messages you have received on this screen. You can do this by clicking the “Reply” button or by starting a new message to the corresponding school/district.
Only the sending LEA can “Resolve” a message. The LEA receiving the message can only “Reply,” not “Resolve.” Once a message is “resolved” by the sending LEA, it cannot be restored.
Locating a Specific Student
New messages must be created based on a specific student, from that student’s Student Detail screen. To open a specific Student Detail screen, you need to start by viewing the Agency menu, Student Search screen.
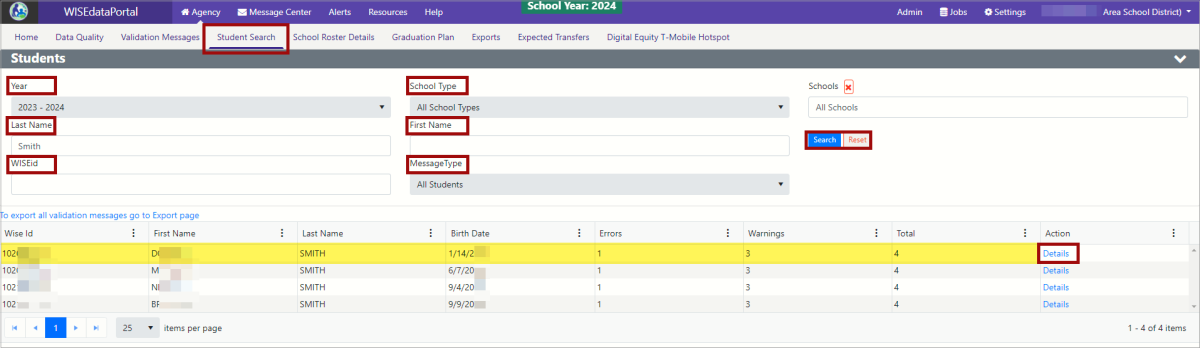
From the Student Search screen, enter the information needed to locate the student you are seeking. You can enter information into any or all of the following filter/search options:
- School Year
- School Type
- Schools
- Last Name
- First Name
- WISEid Message Type (warning/error)
Once you have your search items entered, click the blue Search button. Results will display in a table below the filters.
Click the blue, hyperlinked “details” from the Actions column. This will open a new tab in your browser, displaying that specific Student Details screen.
If the student you are looking for does not appear, reset the search filters and try again.
Sending Messages About a Student from the Student Detail Screen, WDP Agency Menu
Each Student Detail screen has a green banner across the top with the student’s name, WISEid, date of birth, and Local Person ID.
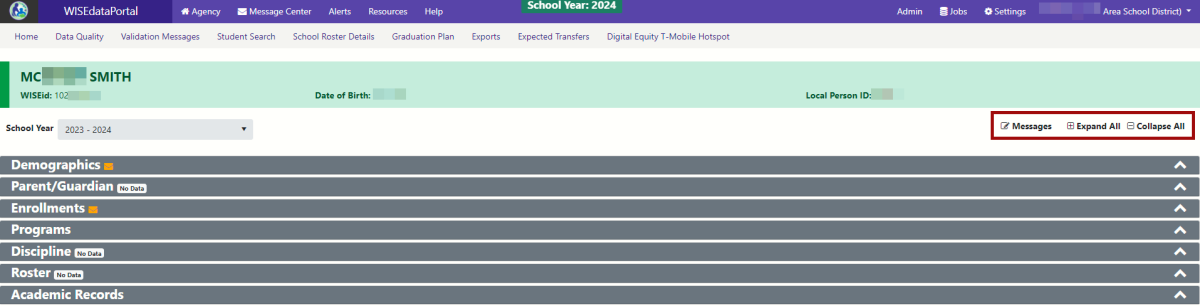
Underneath this banner, on the right side of the screen are three icons:
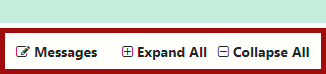
- Messages
- Expand All
- Collapse All
Messages is the icon we will focus on. (NOTE:The “Expand All” and “Collapse All” icons do not refer to the Message Center. Those actions actually refer to all of the gray and teal headers on the Student Detail screen.)
Clicking the Messages icon will open a pop-up window:
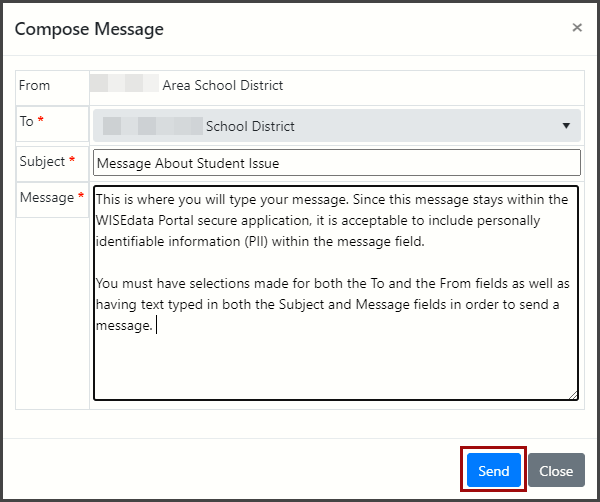
From here, select the:
- “From” district: This will display the school/district that is logged in.
- “To” district: Remember that message sending must be based on a specific student. If the student you’re messaging about only has an enrollment in your LEA, then the message can only be sent to your own LEA. Messaging between different LEAs only works when:
- Two or more LEAs have an enrollment for that student or
- When the FAPE LEA is different from the student’s Attending LEA.
- Subject: Provide a subject for your message.
- Message: Type your message. It must be limited to 4,000 characters.
Clicking “Send” (as well as clicking "Close") will close the pop-up window.
Clicking send will also generate an email to the primary and secondary WISEdata contacts, informing them that they have a new message in the WISEdata Portal Message Center.
Message Center Screen to Continued Communication
Return to the Message Center screen to continue the communication about this student until the message is “Resolved.”
When an LEA receives a new message in the Message Center, there will be a little orange "New!"indicator nest to the Message Center in the top WISEdata Portal Menu bar.

Click the WISEid to view the specific Student Detail screen for the student.
Click the Message Subject to view the message.
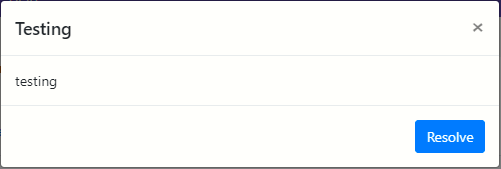
Here is what the Sending agency will see:

Only the Sending agency can Resolve the message since they created it.
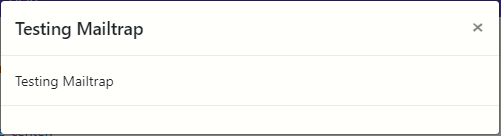
Here is what the Receiving agency will see:

Receiving agencies cannot Resolve a message that they did not created.
Data Elements Related to the Message Center
- FAPE Responsible School/District data element page
- School/District of Accountability data element page
- Submitting District data element page
- Resident District data element page