WISEid/WISEstaff Overview & Basic Person Management
WISEid Home Page
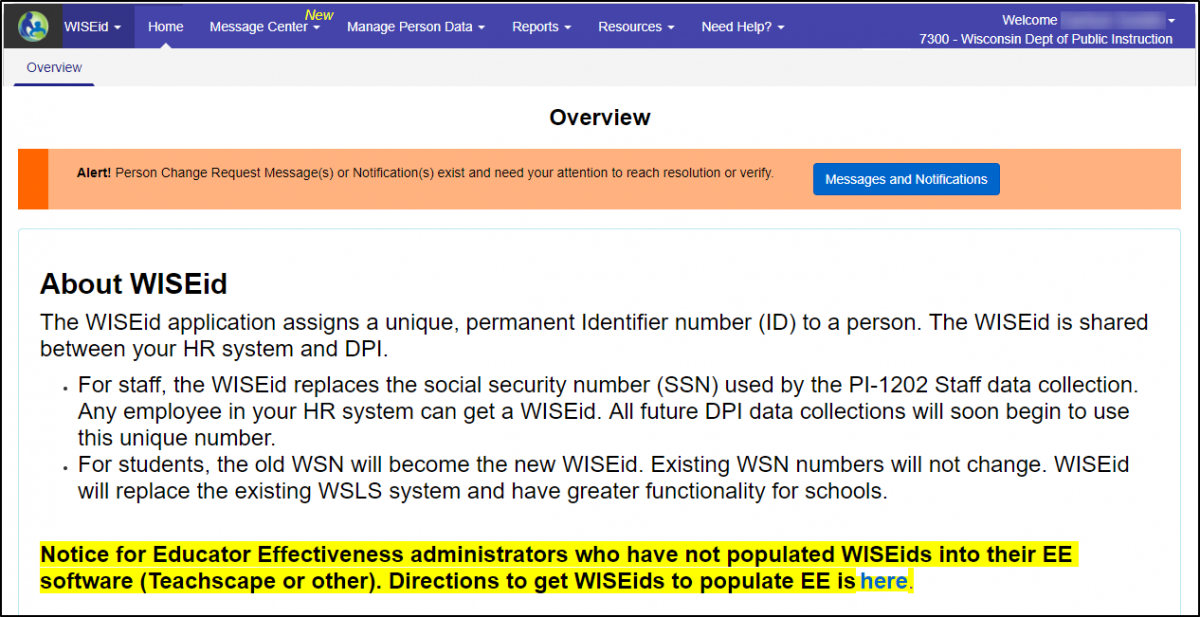
The Home screen provides a menu of the functions available on the left-hand side. If there are important news items or announcements, they will be posted on this main page.
Sections
-
In the Message Center, you can view change requests and notifications in your inbox.
-
Use the Manage Person Data section to search for or edit a person, as well as work with duplicate IDs and communicate with other districts and schools about changes to student and/or staff information. You can also upload and work with data files in this section.
-
View reports and manage and validate your data in the Reports section.
-
Depending on their role, some users may also have access to the Resources menu.
Admin Menu: Update Contact Info
The agency administrator updates WISEid/WISEstaff system contact information here. Both Primary and Secondary Contacts are required for each agency and must be updated each year. Use the Edit or Delete icons to the right of the email address to make changes or delete a contact.
WISEid/WISEstaff Person Menu
Person Search/Edit
This feature allows you to look up persons by entering known information about them and clicking Search.
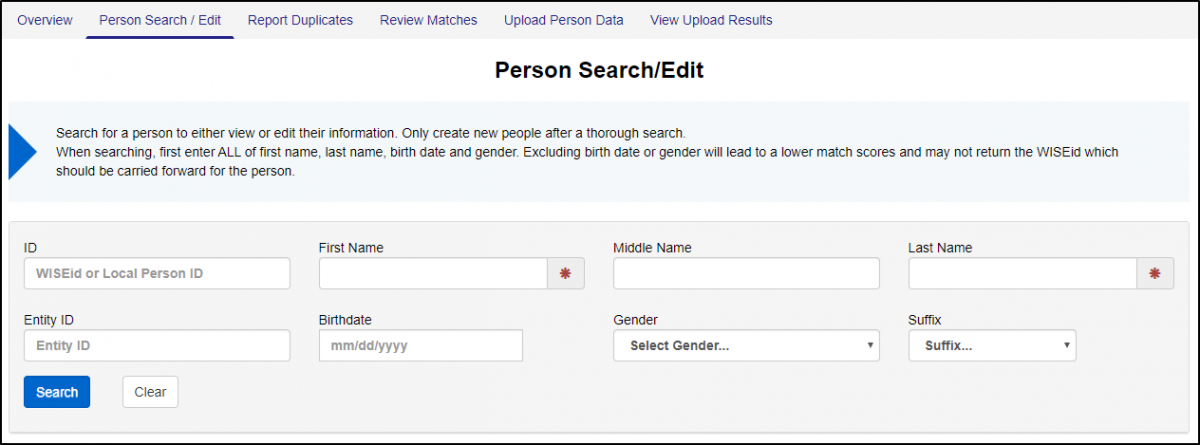
Person suggestions will show below your search. Green highlighted boxes match your search criteria as entered. You can click the [+] to expand more summary details or click the WISEid number to see the full details about the person.
If you click the WISEid link, you will be taken to the person's record where you can edit the demographic data and Local Person ID. If the person has any errors or warnings, the validation messages display at the top of the page.
For staff members, you will also be able to edit a great deal of information regarding contracts and assignments. See the tutorial on Adding Contracts and Assignments for more information. Still on the Search/Edit screen, you can also edit or delete the Entity ID. Near the bottom of this screen, you can view two informational tables with assignment and contract data.
Report Duplicates
If you find that one person has two different WISEids associated, you should report the WISEids as duplicates. Type the two WISEids into the boxes and explain in the comment section what you think happened, as well as which WISEid should be retained.

Changes/Change Requests
A change request is created when you upload changes to a person’s record. These change requests can occur for many different reasons, for example, to change the spelling of a name due to a marriage, to update a Local Person ID, or to fix a spelling error from a previous upload. You can access this screen by selecting Change Requests under the Message Center menu.
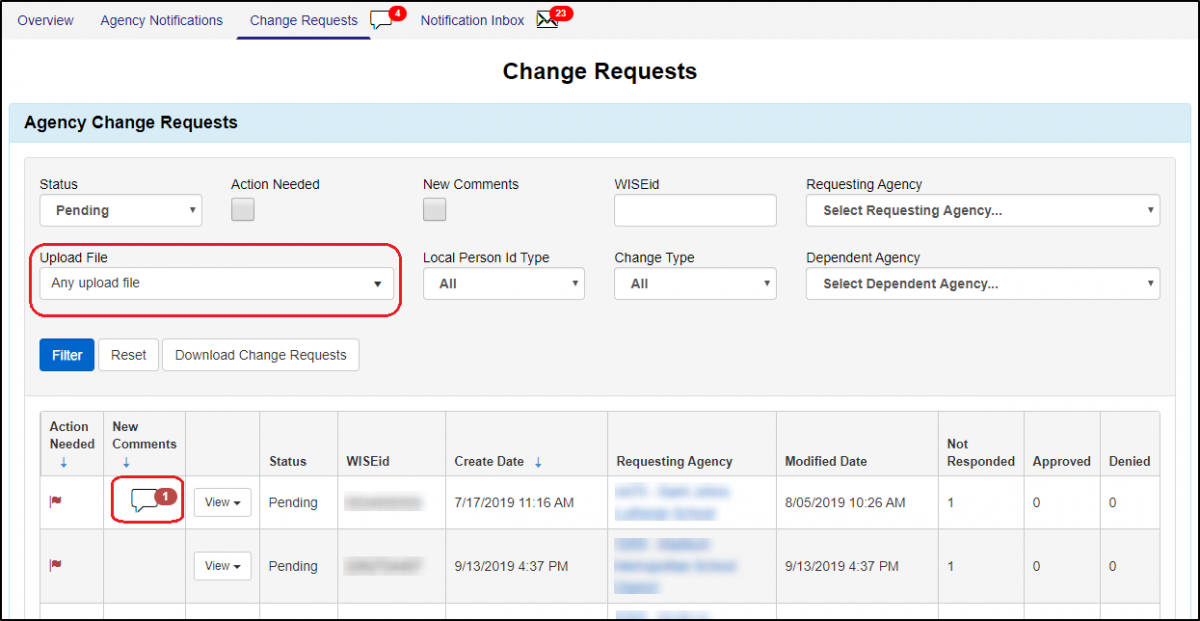
Once in the Change Requests screen, you will see a listing of change requests. Requests with a red flag mean they are waiting on your district for action. You can also filter this listing by Upload File to see change requests that you have created for other districts to review.
To see more about the request, click View and the request will expand. Here you can see the requested change. Before denying a request, you need to enter in a comment about why you are denying it. Conversations can happen in the comments sections to determine if the change is correct or not.
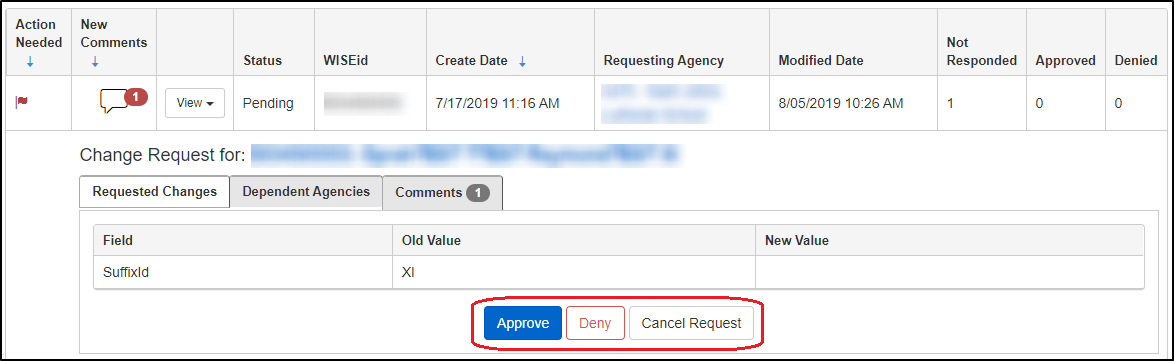
When should you deny a Change Request?
Change requests should only be denied when you have legal documentation proving that the request is incorrect (for example, a Birth Certificate). Race changes are up to parent choice and should not be denied unless you believe that incorrect persons may be linked together. If you believe that two people are incorrectly linked, please create a Help Desk Ticket and a WISEsupport member can help you separate the people.
Appeal a Change Request Denial
If a change request is denied, the agency initially requesting the change will have one chance to appeal to DPI. With the denied change request selected, click the Appeal to DPI button and then enter comments about why you believe the change should be approved, including as much detail as possible to verify the request. DPI staff will then review the appeal and either approve or deny it. If DPI denies the request for appeal, it cannot be appealed a subsequent time.