
Terminology
The following icons are used throughout WISEdash for Districts:
| ICON | DESCRIPTION |
|---|---|
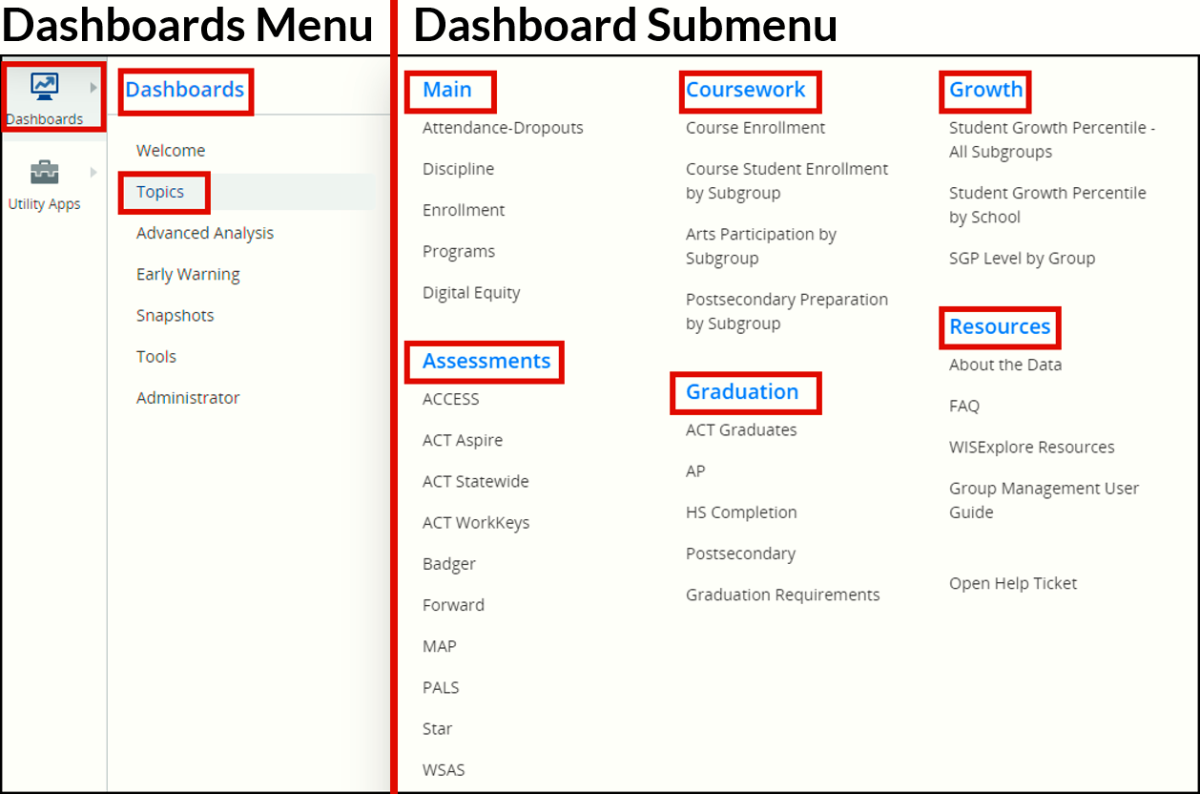
| Dashboards Menu (upper left screen). Dashboards appear on the left, and their corresponding sub-menus appear on the right. Sub-menus are dynamic, changing with the selected dashboard. | |
| Utility Apps (upper left screen, below dashboards icon) | |
| Dashboard Tools (mid-right screen in darker gray area) |

Step-by-Step Instructions - Overview
This introduction gives you the basic steps. Each step will go into more detail below, including screenshots to assist with your navigation.
-
Log in to WISEdash for Districts via WISEhome.
-
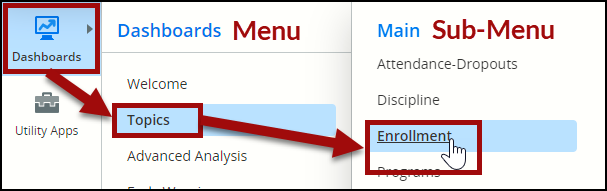
To view dashboards, click the dashboards icon.

-
Select on the Dashboard Sub-Menu item you want.
-
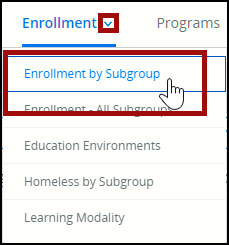
Select on the Dashboard Drop-down you want.
-
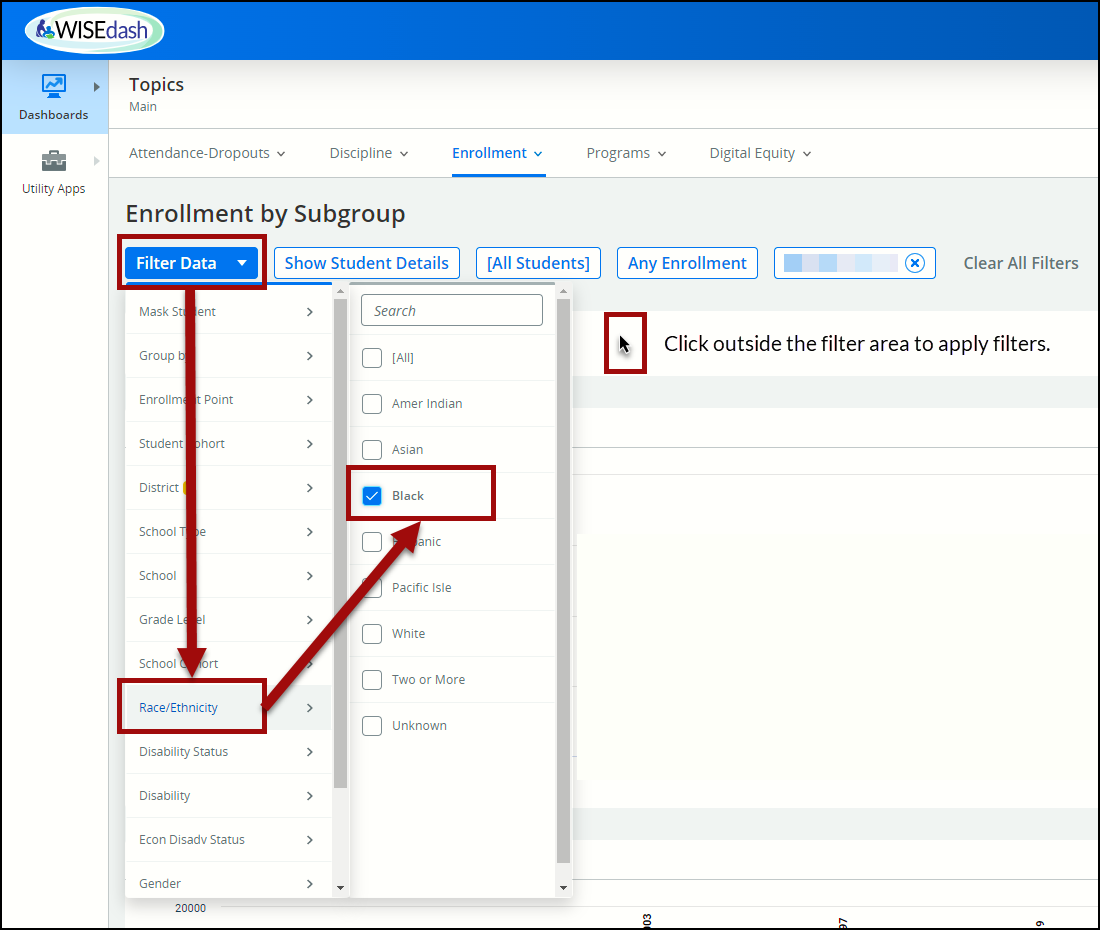
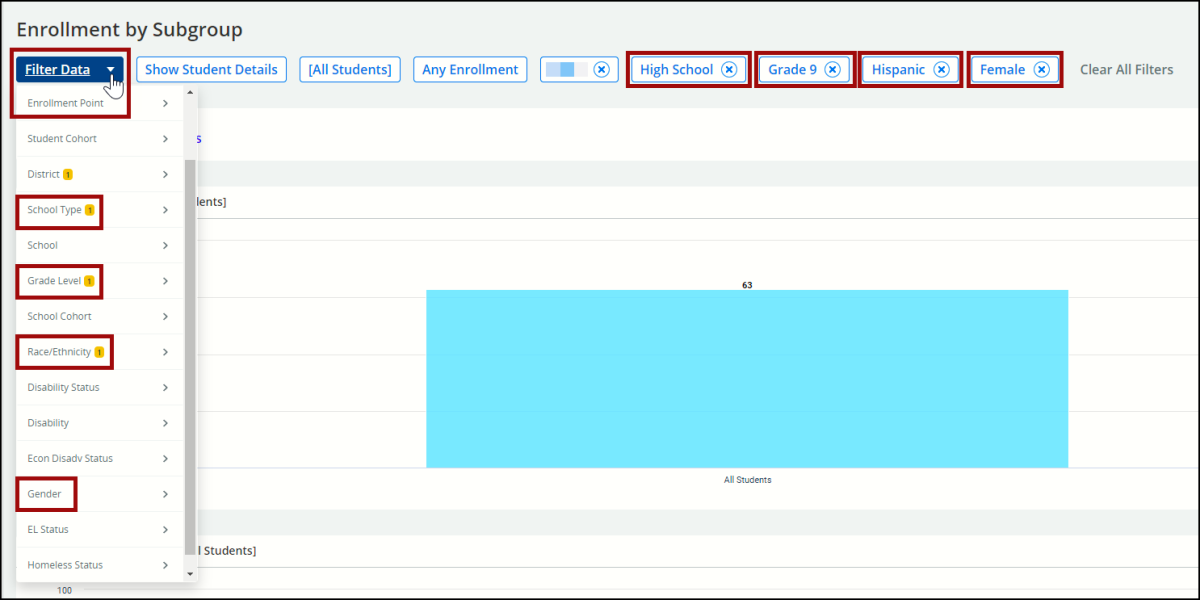
Click the blue “Filter Data” button to refine desired data. Click outside the filter area to apply the filters. If the dashboard displays, “No data found”, try adjusting:
-
the school year filter to an earlier year
-
any filters mentioned in messages displayed on screen
-
Step-by-Step Instructions - Detailed Descriptions:
Click the links below to navigate to different steps within this section:
Step 1: Login to WISEhome
- Log in to WISEdash for Districts via WISEhome.

Helpful information can be found on the WISEhome and WISEsecure Login Information page.
Steps 2, 3 & 4: Dashboard Menu Items, Sub-Menu Items and Drop-Downs
- To view dashboards, click the dashboards icon.
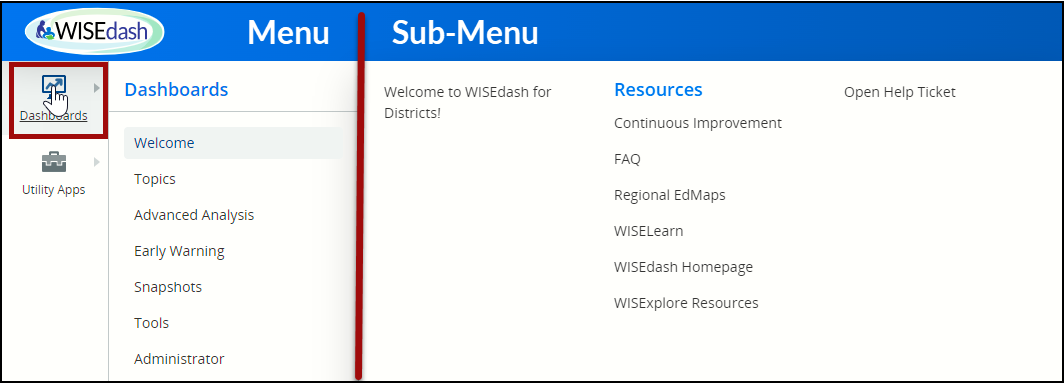
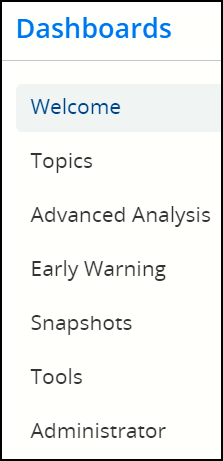
- Click through the Dashboards Menu Items (left side). Options for dashboards are dynamic, changing sub-menus and drop-down options within each listing as you click.
-
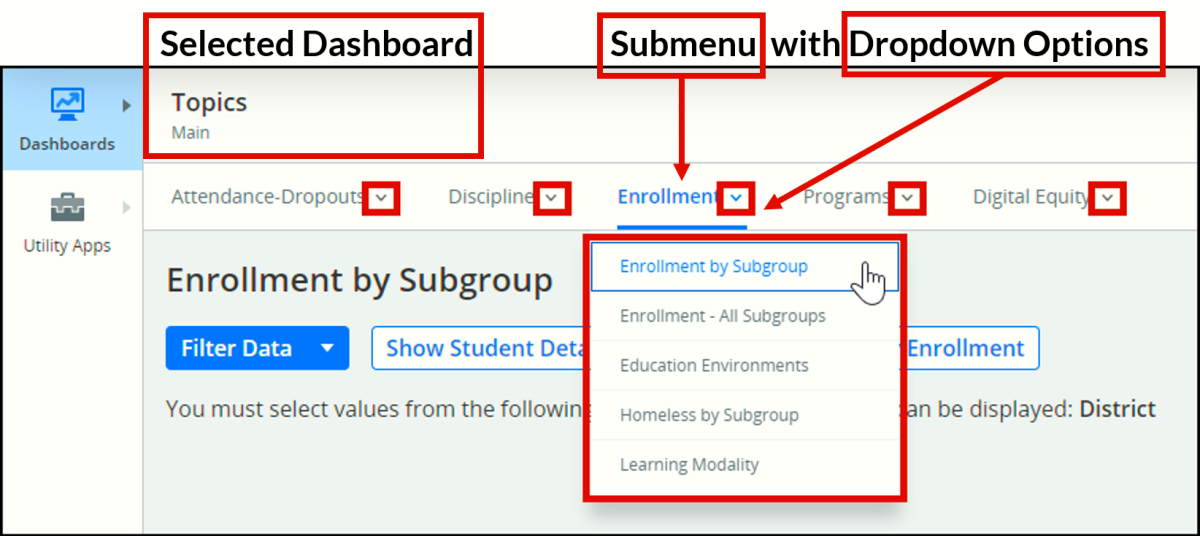
Once you have selected the dashboard menu item and sub-menu items you want, your screen will display that dashboard. The selected dashboards menu item appears in the top-left corner, adjacent to the dashboard icon.
-
Submenu appears horizontally, below the selected Dashboards Menu item. Filters appear below the submenu.
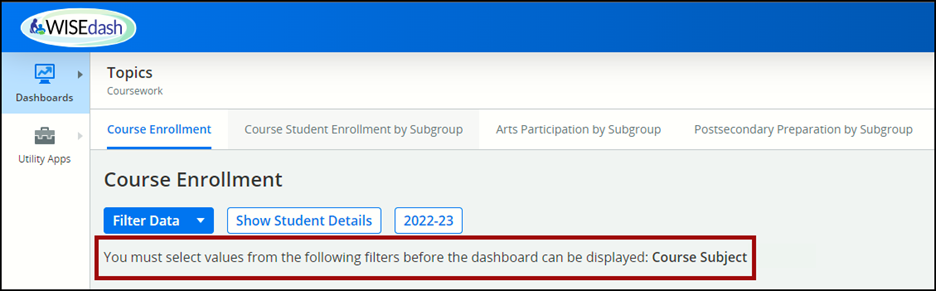
Step 5: Filter Messages and Dashboard Display
-
Click the blue “Filter Data” button to refine desired data.
-
If specific filters are required, messages will notify you:
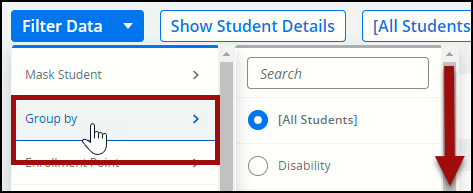
"Group by" Filter
The “Group by” filter allows you to group the data by disability, disability status, EL status, ELP code, gender, grade level, migrant status, race/ethnicity, or student cohort. Once selected, all metrics on the dashboard will be broken down into the group selected. This feature can be used to compare two subgroups. To find more information, view the "Compare Two Subgroups" Google slides.
More Help and Resources
-
WISEdash for Districts Quick Start Video Tutorial: A 3 minute video describing WISEdash navigation and features.
-
How-to Guides: Short presentations describing WISEdash navigation and features. NOTE: As new training materials are developed to align with the upgraded WISEdash for Districts platform, they will be created as webpages located on the WISEdash Training and User Guide page. When all materials have been updated, the Google Shared Drive housing the "How-To's" will be deleted.
-
WISEdash Info, Help and FAQ page: Home page for WISEdash for Districts.
-
WISEdash ATD: About the data pages for all WISEdash for Districts data topics.
-
Data Privacy: Home page for DPI training around resources around student privacy.
-
WISE Home: WISE intro video and basics about WISE.
-
Consider joining our WISE Community! A Microsoft Teams environment where you can read up on current topics and post questions.
-
Would you like to ask questions directly to a Customer Services Team member? We also host a recurring WISE User Group Webinar! Join us!
Didn't Find What You Needed?
We are here to help!
If the question you’ve been trying to answer isn’t showing up on our training or web materials, please open a Help Ticket.
Help Ticket for WISEdash - when the ticket is open, select WISEdash for Districts from the Applications drop-down menu.