
Purpose of Viewing/Using Student Profile Data
The Student Profile may be used to view individual student data (such as demographics, SPED indicators, CTE, early warning, attendance, discipline, enrollment, assessments, graduation, growth, roster, and snapshot data) in order to assess individual students’ academic needs and assist them in becoming a high school graduate that is college and career ready.
Terminology
The following icons are used throughout WISEdash for Districts:
| ICON | DESCRIPTION |
|---|---|
| Dashboards Menu (upper left screen). Dashboard menu items appear on the left. Each Dashboard menu item has a corresponding sub-menu that appears on the right. Sub-menus are dynamic, changing with the selected dashboard. | |
| Utility Apps (upper left screen, below dashboards icon) | |
| Dashboard Tools (mid-right screen in darker gray area) |
Step-by-Step Instructions - Overview
There is more than one way to navigate to the student profile in WISEdash for Districts. These instructions give general steps for each method. More detailed instructions for each method are provided below, including screenshots to assist with your navigation.
NOTE: Only WISEdash users with specific roles have access to student level detail.
Method 1: Student Search
-
Log in to WISEdash for Districts via WISEhome.
-
To view dashboards, click the dashboards icon.
-
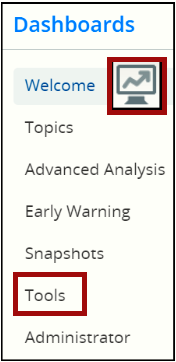
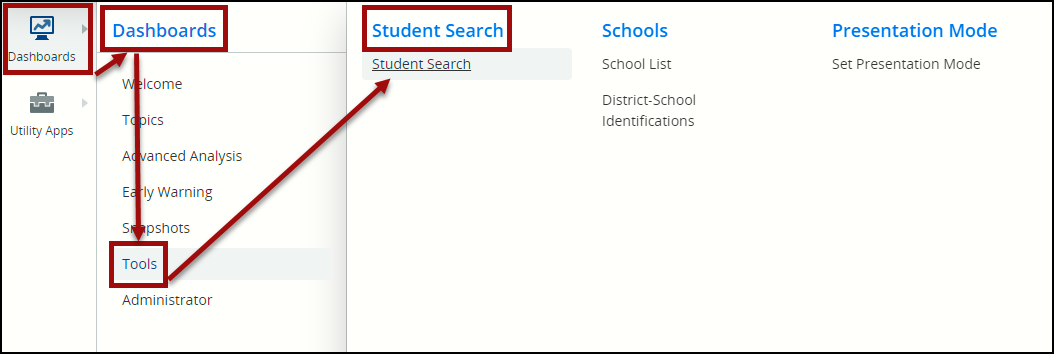
Click “Tools” from the Dashboards Menu items.
-
Select “Student Search” from the sub-menu items.
-
Use filters to obtain/refine data and view student profile.
-
NOTE: a max limit of 10,000 students can be displayed.
-
Method 2: Drilling In from a Chart
-
Log in to WISEdash for Districts via WISEhome.
-
Navigate to a chart on a dashboard.
-
Select a bar containing a list of students you wish to view.
-
Select a student from the detail list.
-
View the student profile.
-
Method 1, Step-by-Step Instructions - Detailed Descriptions
-
Scroll through the content below to learn how to do a Student Search using the Tools menu item.
Step 1: Login to WISEhome

Helpful information can be found on the WISEhome and WISEsecure Login Information page.
Steps 2 & 3: Dashboards Icon, Dashboard Menu
To view dashboards, click the dashboards icon.
Click Tools from the Dashboard menu
Step 4: Dashboard Submenu
Select Student Search from the submenu.
Step 5: Use Filters to Refine Data and View Student Profile
A max limit of 10,000 students can be displayed. Use the filters to narrow down your search.
If no data appears, a likely reason is that you need to select more filter options.
- If you are seeking a specific student, filter/search by last name, first name &/or WISEid.
- Broader searches can be done by Cohort, grade level, etc.
NOTE: Be sure to use the Mask Student > Hide Student Details as needed to protect Student Personally Identifiable Information (SPII).
When you have entered all of your filters on the Tools > Student Search dashboard, you will see a Student Search results bar (above the actual results), showing you how many students matched your search criteria. (NOTE: The ‘hamburger’ menu (three horizontal lines) will reveal a drop-down menu, but these filters do not function within this table.
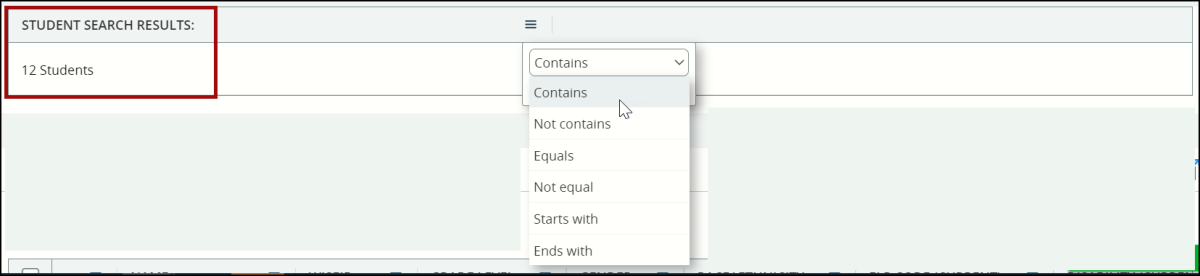
Results will appear in a table below the Student Search.
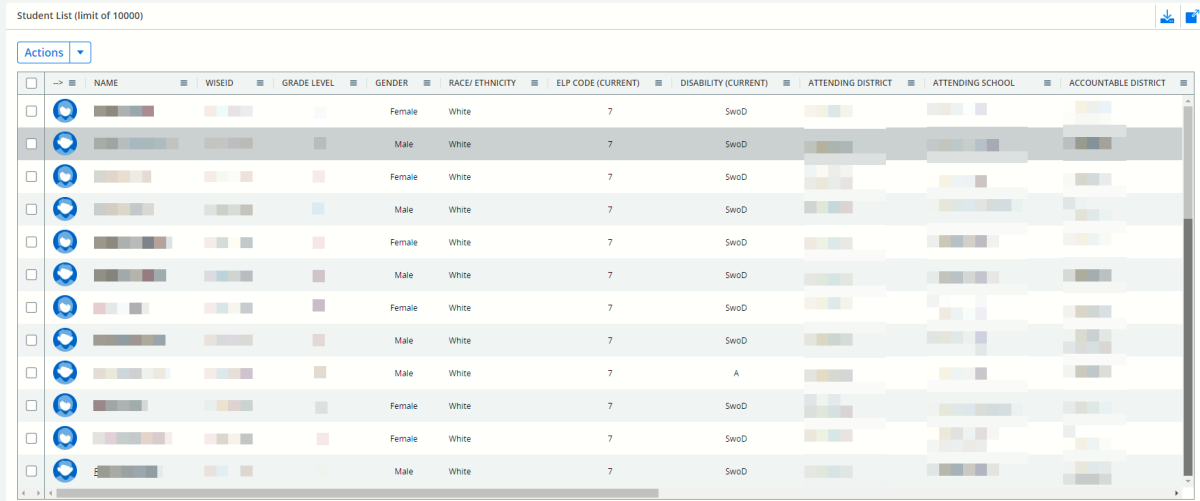
This table of results can scroll vertically to reveal more students, and horizontally to reveal more categories.
The categories for column values (available horizontally across the top of the table) are:
Attending District
Attending School
Accountable District
Accountable School
Current Indicator
DEWS+/-MOE
Disability
ELP Code
First Grade Cohort
Gender
Grad Cohort
Grade Level
Latest DEWS Outcome/Score
Name
Race/Ethnicity
WISEid
Each of these column values can be clicked once to adjust the view to ascending order (indicated with an upward arrow), clicked twice to adjust the view to descending order (indicated with a downward arrow), and clicked a 3rd time to return to the default display order (no arrow).
Click on a specific student to view their information in detail. This information will open in a new tab on your browser as a Student Profile dashboard, specific to that individual student.
The Student Profile Dashboard
The Student dashboard profile displays a series of submenus horizontally across the top:
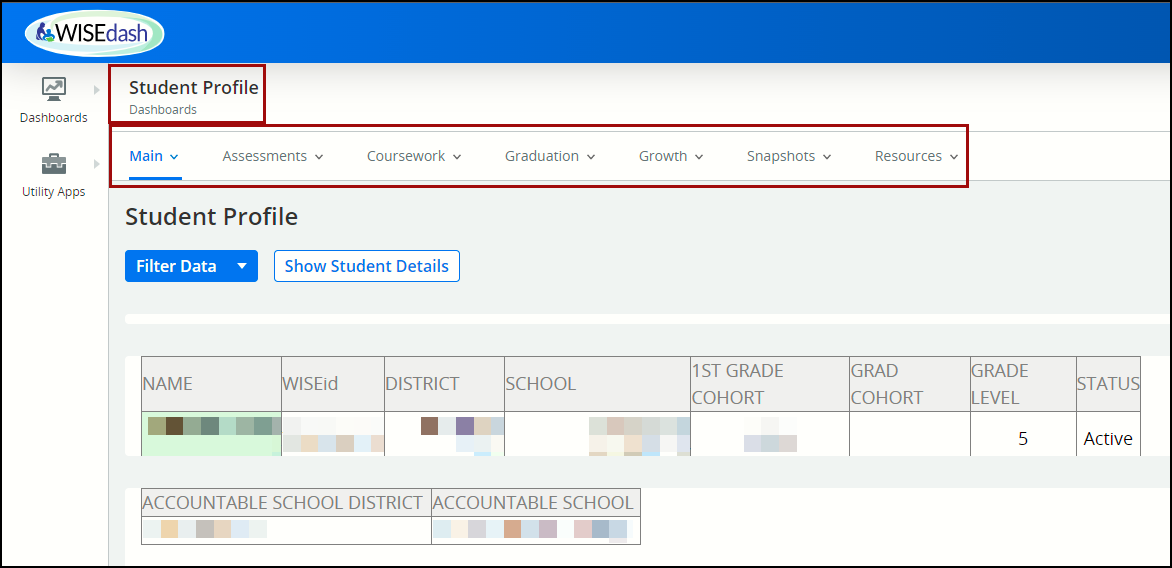
Each of the submenus has dropdown options.
- Main: Student Profile, Attendance-Dropouts, Discipline, Enrollment, SPED
- Assessments: Summary, ACCESS, Aspire, ACT 11, Badger. DLM, Forward. MAP, PALS, Star, WSAS
- Coursework: Courses
- Graduation: ACT Grads, AP, HS Comp, Postsecondary
- Growth: Growth
- Snapshots: TFS Count Date/Oct 1 Child Count, Year End, Roster, Spring Demographics
- Resources: About the Data, FAQ, Open Help Ticket
Selecting any of the submenu and dropdown items will dynamically change the display of the selected student’s dashboard.
Below the submenu on the Student Profile page, is a small table. Name, WISEid, District, School, 1st grade cohort, graduating cohort, current grade level and status are displayed, along with Accountable school district and accountable school.
Further down the screen, information about the following categories is presented in separate tables and charts:
- Demographics
- Other Indicators
- Career Technical Education
- Economic Indicators
- DEWS and CCREWS
- Student Programs (i.e., Coordinated Early Intervening Services, Language Instruction Services, Learning Modality, etc.)

Use the More Info button to obtain a pop-up window specific to that topic, with a content tab and a definition of terms tab.A pop-up window will appear, displaying the table you selected in the “Content” tab. There will also be a “Data” tab and a “Definitions” tab.
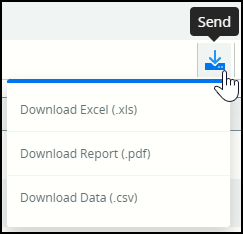
The Student Programs table, which displays at the very bottom of the screen, has the “More Info” button and also has the “Send” button. Use the Send button to download or export the data.
-
Method 2, Step-by-Step Instructions - Detailed Descriptions
-
Scroll through the content below to learn how to do a Student Search using any chart on a dashboard.
Step 1: Login to WISEhome
Log in to WISEdash for Districts via WISEhome.
Helpful information can be found on the WISEhome and WISEsecure Login Information page.
Step 2: Navigate to a Chart on a Dashboard
-
Any dashboard will allow you to achieve this.
-
In the screenshot below, I have selected Topics > Discipline> All Students > 2022-23
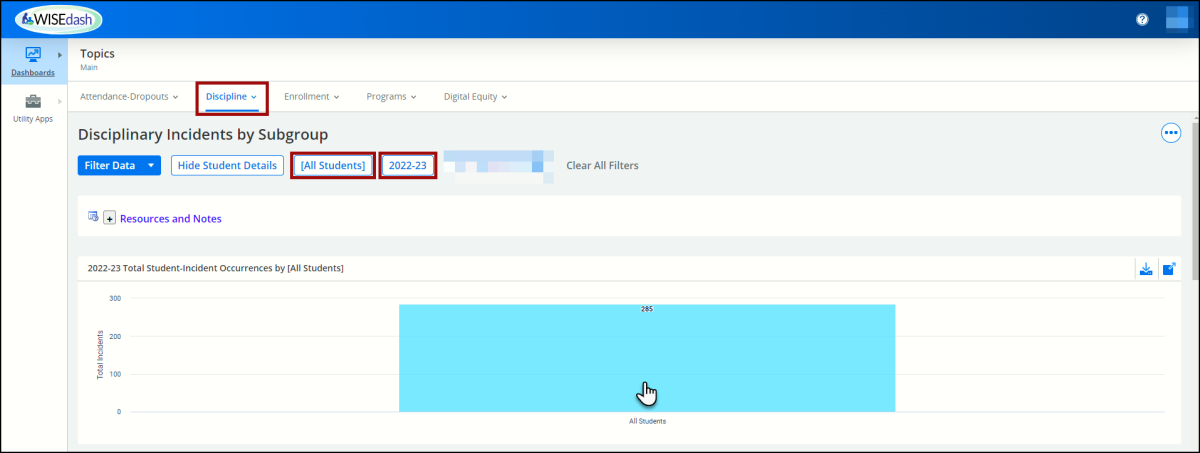
Step 3: Select a Bar Containing a List of Students You Wish to View
Clicking on the bar from the bar graph you selected will change your screen.
You will see a table view of all the individual students who make up the data of that bar in the bar graph, listing them alphabetically.
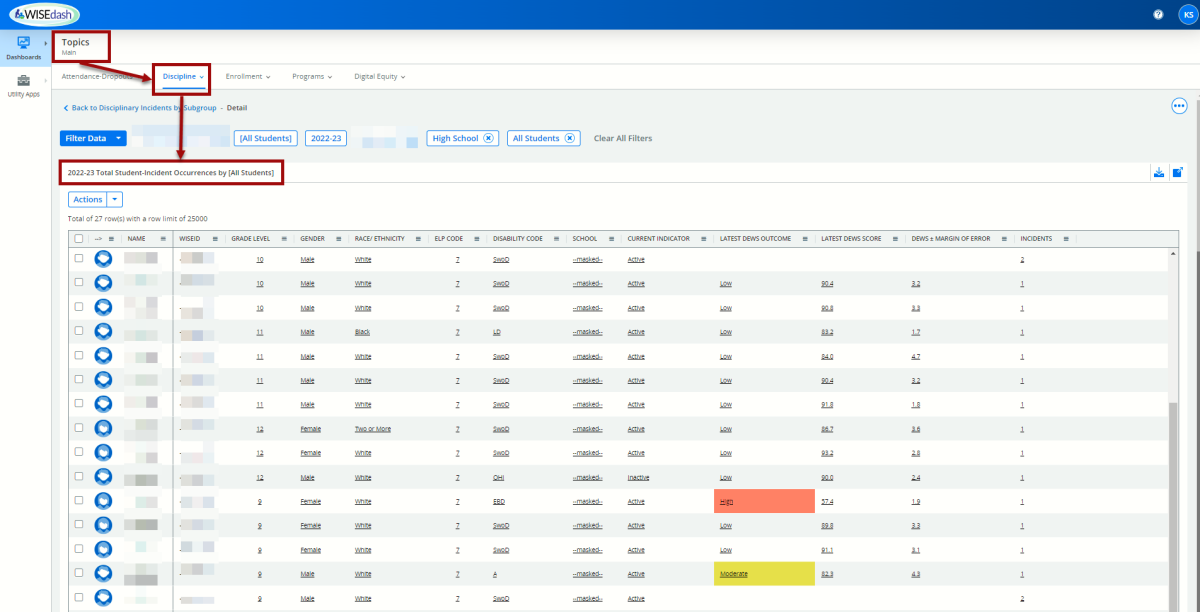
Step 4: Select a Student from the Detail List
Select the student whose profile page you want to see. This student’s individual Student Profile will open up as a new tab within your browser.
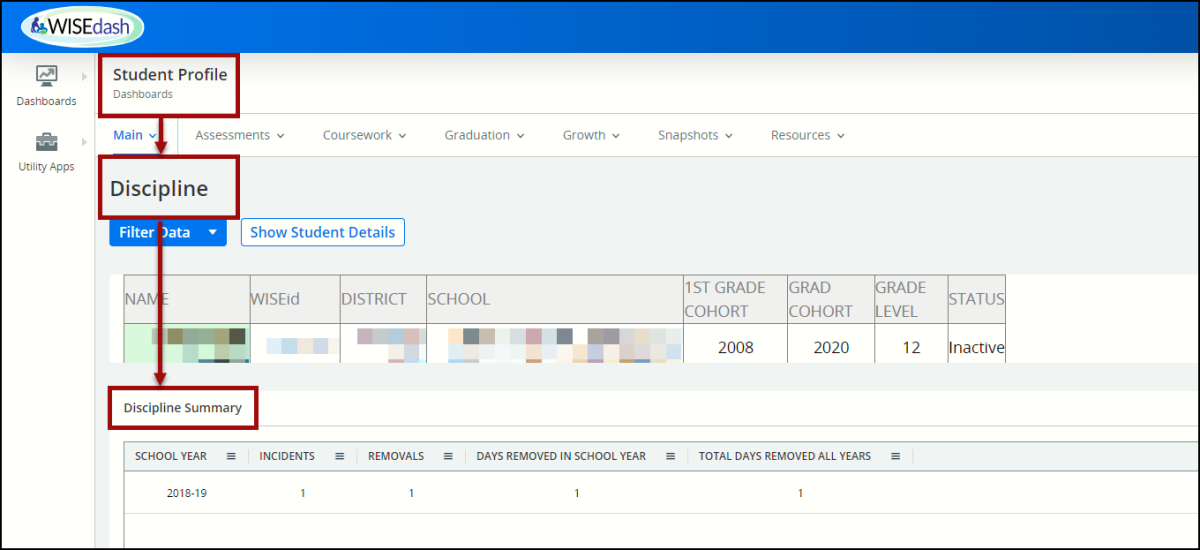
Clicking on a student from a student list of a specific dashboard (i.e., Discipline, as per the screenshot example above) the individual Student Profile will display student information specific to the previous dashboard (like the Discipline profile dashboard) as opposed to the default Student Profile.
Step 5: Use Filters to Refine Data & View Student Profile
Please use the instructions for this step located in Step 5 of Method 1.
-
More Help and Resources
- Snapshot Preparation: A Detailed Guide (Google slides)
- How-to Guides: A Google folder containing short presentations describing WISEdash navigation and features.
- WISEdash Info, Help and FAQ: Home page for WISEdash for Districts.
- WISEdash ATD: About the data pages for all WISEdash for Districts data topics.
- Data Privacy: Home page for DPI training around resources around student privacy.
- WISE Home: DPI landing page for the WISE system, contains intro video and basics about WISE.
-
Consider joining our WISE Community! A Microsoft Teams environment where you can read up on current topics and post questions.
-
Would you like to ask questions directly to a Customer Services Team member? We also host a recurring WISE User Group Webinar! Join us!
Didn't Find What You Needed?
We are here to help!
If the question you’ve been trying to answer isn’t showing up on our training or web materials, please open a Help Ticket.
Help Ticket for WISEdash - when the ticket is open, select WISEdash for Districts from the Applications drop-down menu.